Saturday, October 29, 2011

Skill Builder Series - Leaders, Enders and Strings

Waaay back in May, I wrote a small post on leaders and enders as part of the Skill Builders Series. In a recent post, Weekend Recap, I mentioned that I'd done my string blocks as leaders and enders and I received a comment from Lynne asking:
I am new to the concept of leaders/enders; I haven't used them and don't chain piece (yet). Could you please explain how you use the string blocks as your leader/ender project for this novice (who is always keen to learn something new)? 
I thought about replying in an email to her, but then realized that it was clearly time for another tutorial, because of all the photos I would be taking anyway. So, Lynne, here is the tutorial I promised all that time ago. I'm just sorry it took me this long to find time to sit down and write this! And, I'm sorry that the photos are dark. Now that I'm working two jobs, most of my sewing time is stolen from those hours that I should be sleeping!

Let me preface the tutorial itself by saying that I typically use string blocks as the no-thinking portion of my sewing and to keep the machine running whenever I'm working on a block or series of blocks that require me to stop and start. When I took the photos for this tutorial, I was working on blocks for the Test Your Skills Sampler (which I have to photograph and catch up on, bad me!). This means that I have the pieces pre-cut for whatever my primary project is. Pre-cutting is the only that I've been able to maximize my time at the sewing machine lately, so this means that I have tons of time for string blocks too.

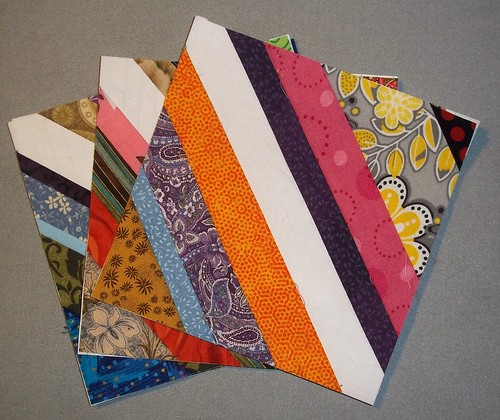
So, in addition to having my primary piecing ready to go, I have my components for the string blocks ready to go:
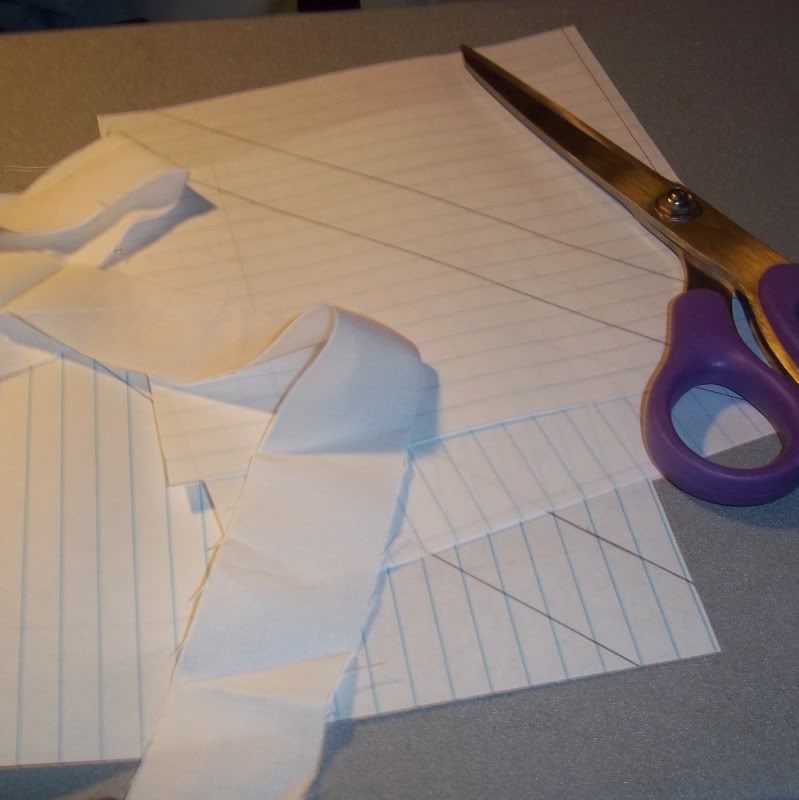
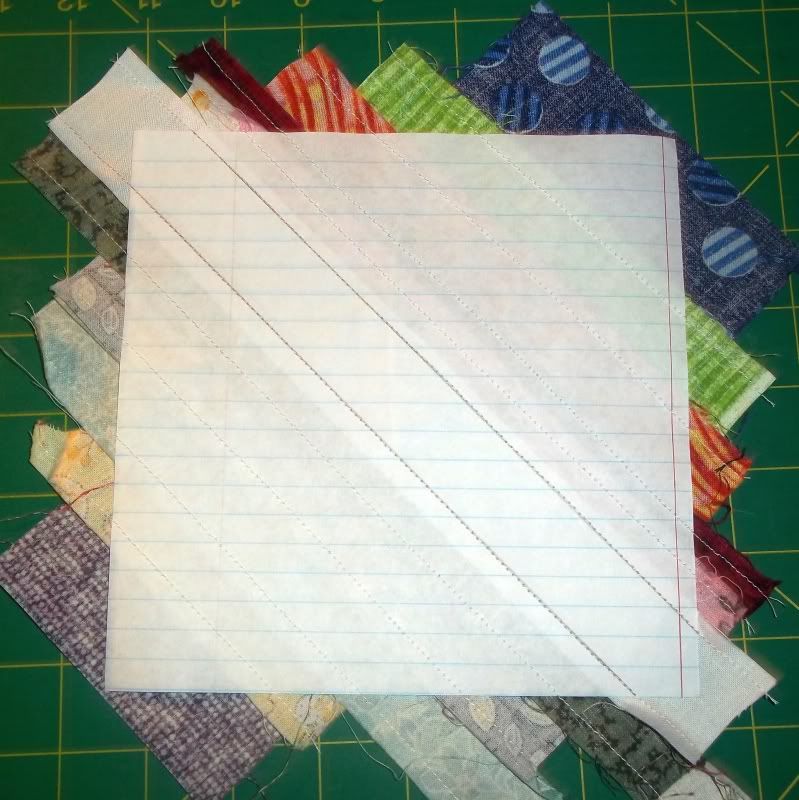
Because of the sheer number of string blocks that I'll need to complete a top, I simply bought a pad of lined notebook paper at my local office supply store while it was on sale for the start of the school year. At the same time, I went to the printing department there and had them cut the paper into 7" squares for me. They can do up to 250 sheets as once, which totally beats my one at a time. I know 7" seems like a weird size. I actually end up trimming the blocks down to 6 1/2", for a finished size of 6". There's a little more waste this way, but this way I'm certain that I have enough seam allowance.

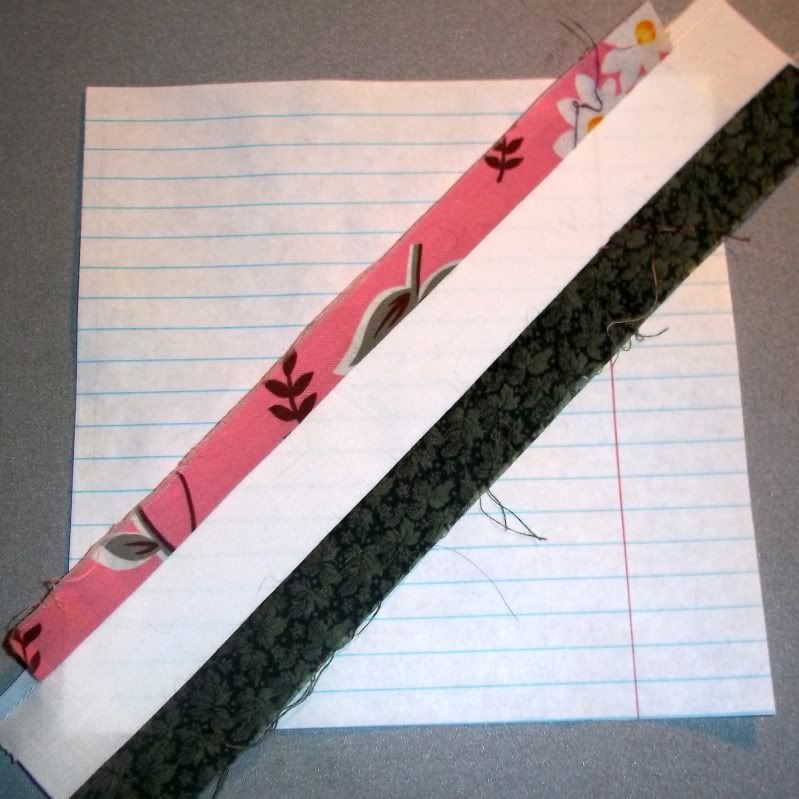
As you can see from the photo above, I've drawn my initial sewing lines on to each sheet. That middle portion of each block is a 1" finished wide stripe of Kona White, to give the top some continuity (whenever it actually becomes a top). I pre-cut my strips of Kona to 1 1/2". I really should remember, next time, to cut them at 1 3/4", so that I don't have to be quite so precise when placing the fabric for these first two seams.


Some time ago, I reduced a bunch of my scraps to strips of various widths. I knew that I wanted to make a string quilt, but I didn't want every seam to match up. I wanted some variety, especially since I knew that my scraps wouldn't all provide the necessary width to produce, say, 1" strips. Some of my pre-cut strips start at 3/4", so that the finished size is only 1/4". Very little was too thin for this project. My favorite part about having all of these strips pre-cut is that I literally just threw them into a box. I blindly reach into the box, check to make sure the strip is long enough and sew it on if it's long enough. Randomness is not a problem with this 'organization'.

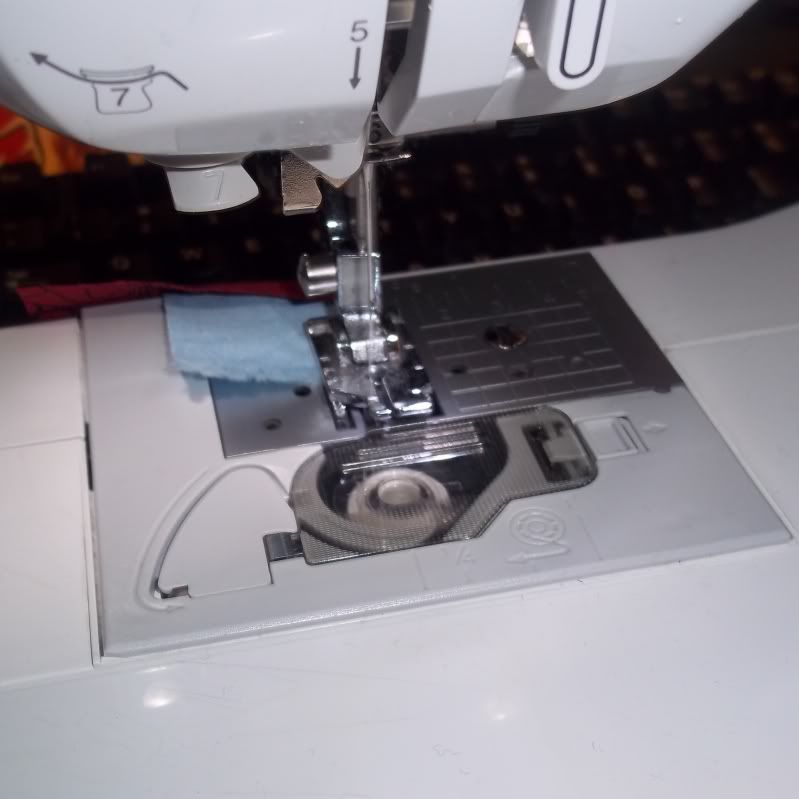
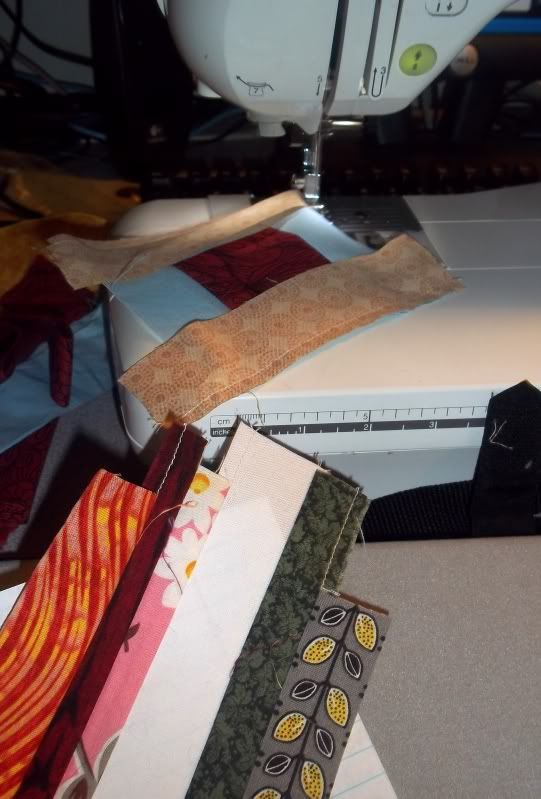
I had a caboose left in the machine from the sewing session previous to this one, so I started working on my primary project, which was the Test Your Skills Sampler Log Cabin Block:
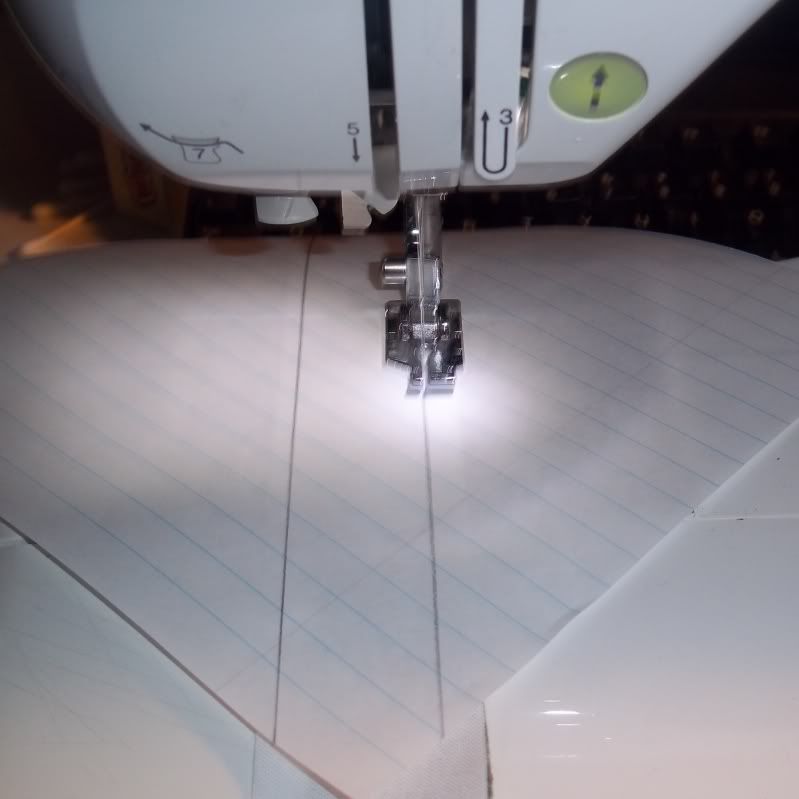
Upon finishing that line of stitches, I lined up my white strip and sewed the first seam, right along one of those marked lines. Slight blurry photo below... Sorry!

You can just barely see the edge of the green strip blow the white one in the foreground of this photo. Right sides of the fabric should face each other, and the wrong side of the center strip will be flush against the paper. Oh, and speaking of the paper... I use the notebook paper for projects like this because it's cheap. I'm not going to waste the Carol Doak stuff on blocks that are this simple.
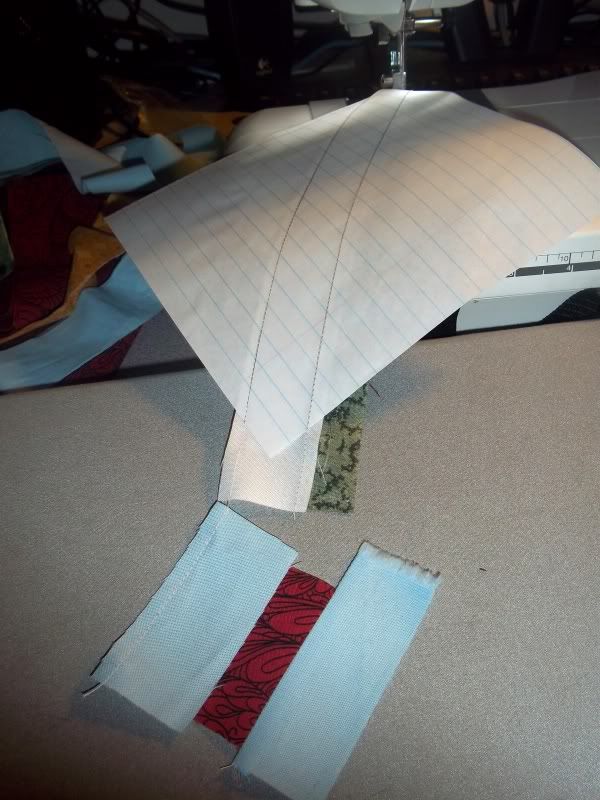
Once I had that first seam sewn on the string block, I continued with my primary piecing. In the photo below, I turned over the string block so you could see the way the two strips were laid on the paper. Not that it's especially descriptive, now that I look at it...
More alternating... Are you all getting the idea that this leader/ender thing is really good about cutting back on the waste thread that results from having to stop and start every time we rotate or add on to a block?  This time, I sewed sewed down along the second drawn stitching line. Again, right sides of the fabric should face each other, and the wrong side of the center strip will be flush against the paper. And, yes, I did twist the blocks around to the front of the machine to get a good photo. The night I was working on this, I did everything on my computer desk, so directly behind the sewing machine (Bessie), is my computer monitor and keyboard. Stolen moments!
I sewed a little more on the primary project, and clipped my string block off the chain in order to iron down the strips. I always iron before adding on to the block, so that I know that I won't have any puffiness in the block, and thus preventing any pleating to take in any extra. I know they're scrap blocks, but I can't help myself.

As you can see, there's extra fabric running over the sides of the paper. Again, I trim down at the end of the process.
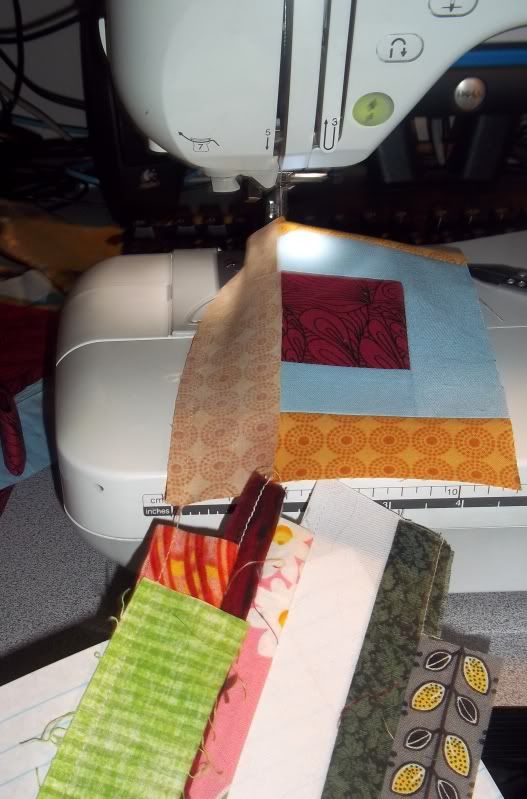
So I pick another strip, and sew it down, followed by work on the primary project. At this point in the primary project, I'd finished the center of the log cabin block and was starting to add the first non-background fabric round.
So, I kept going, alternating string block with log cabin block, always checking the next potential strip to be the right length. If it was too long, I just cut off the part that was too long and threw that bit back into the box of scrappy strips.
...and the Log Cabin and string block just keep growing...
...and growing...
...and growing...
At this point, I'm sure you get the idea. I'll save you from more progress photos that are essentially the same. In the end, I had a Log Cabin block, in which I took some artistic liberty and didn't make all of the non-background rounds from the same fabric.
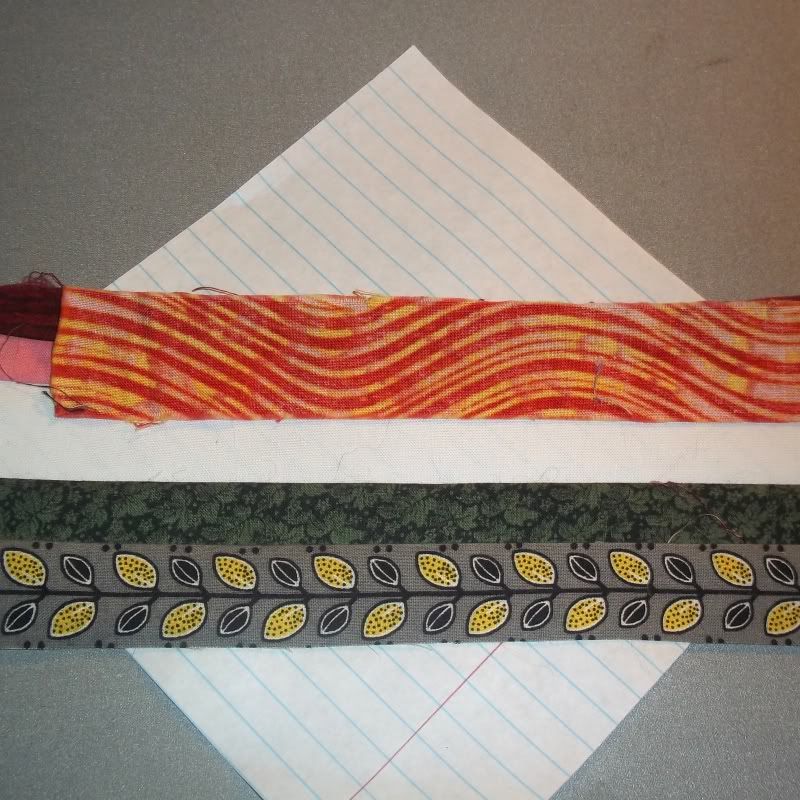
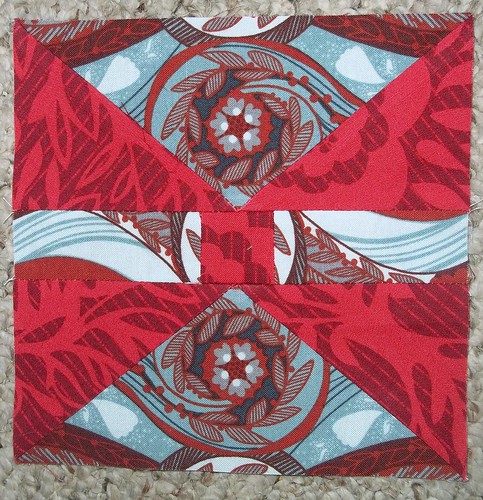
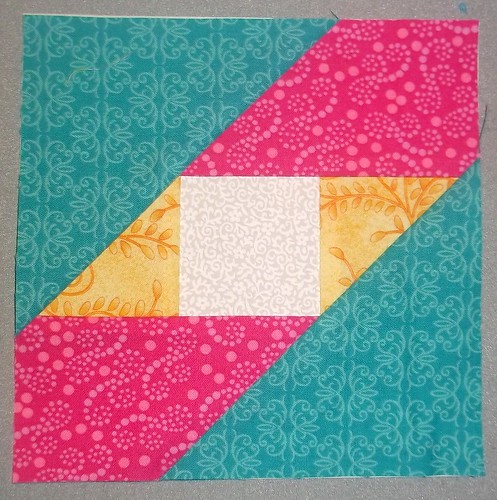
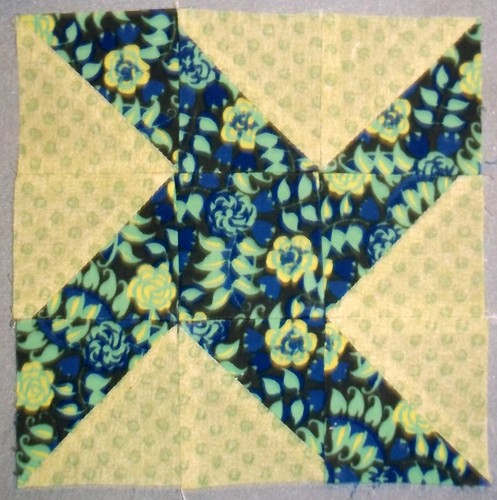
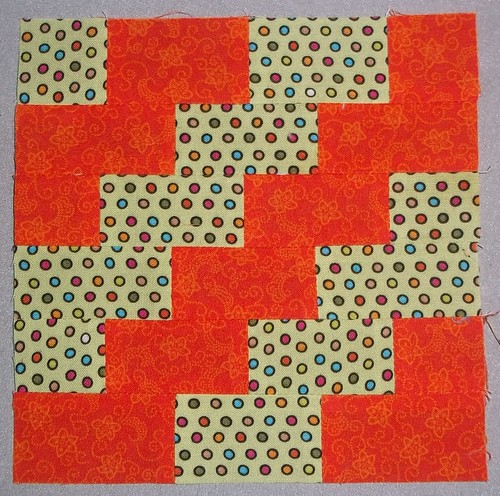
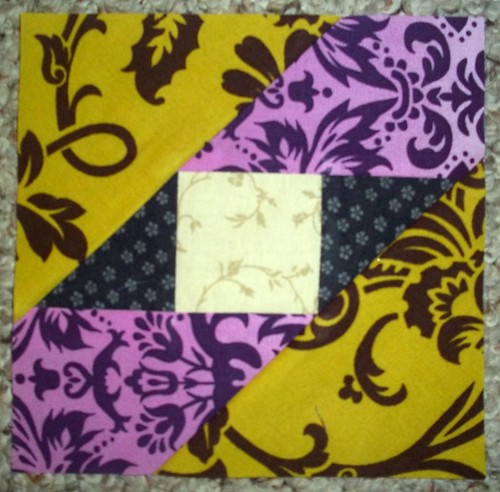
I also had a couple string blocks like this:
I always trim these from the back, so that I can be sure that the white strip in the center of the block is centered. Again, these are cut down to 6.5" for a finished size of 6". They should come out looking something like:
Obviously, you can make these string blocks whatever size you like. You may also use fabric as your foundation. I prefer the paper, so that I can tear it away and reduce the bulk, because I do plan on using batting in this project when I reach the quilting stage. By using paper, I am limited by paper sizes, especially since I don't like using standard copy or printing paper. It's thicker and doesn't tear away as easily.

And that's string blocks, used as leader/ender projects. Don't you just love how quickly and easily these can come together?

Tuesday, October 25, 2011

Thoughts on Fabric

I regularly browse other blogs, because I love to read about what people are doing with their quilting and to see what they are getting inspired over... I also love to read about hot topics, and the things that make us stand up and take notice.


A little bit ago, a visit over to completely cauchy and reading her post about the striking tea towel quilt she made just struck a chord with me...


Okay, so it wasn't just about the tea towel quilt, which is totally worth taking a gander at (and she makes yummy knitted items too!).


cauchy09 wrote:
"Here’s a radical notion: I don’t want to buy quilting fabric anymore.
I know. Right? We’re still looking for signs of alien abduction over here.
I find myself continuously angry at the industry. We’ll save those issues for later. More than that, though, I am continuously angry at myself because I can’t bring myself to use the contemporary quilting fabric yardage that I own. It’s not hoarding. I just know that I don’t design naturally with these prints in amounts more than a small scrap each. Yes, they are beautiful fabrics and I covet them all, but they are not me."
You all know that I buy a lot of tone-on-tones... I posted an in depth look into my buying habits for the Skill Builders Series Part 2A - Buying for the Stash. And, by the end of writing it, I'd started to realize just how much I am starting to dislike even looking at designer print and lines...


It's not that they're not pretty. They're very pretty, and sing to the wannabe graphic designer in my heart.


They're just not usable as is if you're not making big blocks that follow the modern aesthetic.


Unfortunately, the modern aesthetic isn't exactly me. I love to play with design and color. However, I do my playing on a smaller scale. Very rarely do I make a block large than 12" square, and even then it's likely to be a traditional block. When I do make bigger blocks, they have quite a bit of piecing to go along with them. The best way to describe me is that I'm a traditionalist who's not afraid of color (at all - have you seen my DWR-WIP?).


And really, when one works with pieces that typically don't go over 4" square, what's the point of buying a big, bold modern print? Case in point, Anna Maria Horner's Innocent Crush line, which I lovelovelovelove. I got two fat quarters of it from a swap partner, and I swooned over it. The two that I received were Woodcut in Passion and Slow Dance in Vintage.


Beautiful, right? Problem is, the repeat on Woodcut is almost eight inches in width. But I love the rich red! Slow Dance is almost twenty inches. And I'm enchanted by the movement of the lines... I'd been sitting on these two fat quarters for months, feeling trapped by their size. And what was I supposed to do with them?
#005 Bat Wing
Farmer's Wife Block #005 - Bat Wing
In the end, I fussy cut the snot out of Slow Dance and completely lost the repeat in Woodcut. That block finishes at 6". And let me tell you, there is no way that I would repeat this process to make multiples of this block. Fussy-cutting makes the miser in me shriek in pain at the waste of good cotton.


Throw in that fabric lines are so color coordinated and perfectly matched... I find that while I can love individual prints in a line, I often am turned off by seeing the line in its entirety. Why? Because I can't help but feel that if I limit my fabric selection to a single line, I'm not expressing my own creative vision. Every time I sit down with the one fabric line I purchased nearly every print of, I feel trapped. I don't see my own design emerging. I see myself catering to the fabric designer's vision. Not exactly a great starting point. Quite frankly, I've given up on using those fabrics together, and they're being parceled out into other tops.


And that's me and most modern fabrics, over and over and over. I've learned to just look and drool, because otherwise I'll be disappointed that I spent my limited fun money on fabric that's just going to sit there. I support a family on my income, so that $50 or so that I eke out every few months to spend on me!me!me! is something that I want to be able to enjoy long-term. (Especially if that money ends up going toward supplies like batting, thread and new rotary blades instead of fabric every now and then.)


As I stated in my comment on cauchy09's post, I want my skills as a piecer and quilter to be what shine - not my ability to buy attractive fabrics. I feel that the fabrics in my quilts should work together to create a total image, to tell a story together. I want to step back, and see my quilt.

Not the pretty designer fabric that dominates the design.


Because, you know what? That's all I'm going to focus on ten years from now. When that quilt has been used and loved to death, I just know that I'm going to regret having made the focal point of that quilt the fabric, not my skills with needle and thread, color and design. Of course, there's the whole problem of will I even use and love that quilt to death if I have any regrets about it after completion... 


The pretty designer fabric lines out there represent what manufacturers have decided should be in fashion as far as color, shape and line. On top of that, there's new fabric lines constantly releasing. I don't know about you all, but I've already pointed out that my fabric budget is pretty limited. I just can't afford to keep up with whatever is new and bright and trendy. I can't do it with my clothing, so why am I going to do it with fabric?


Now, I'm not out to bash designer fabrics in the modern aesthetic, or the quilters who use them. They're beautiful fabrics, and while I don't always like the quilts that are made from them, the quilter-maker was following his/her muse. And I appreciate that. Quilting is my chosen form of artistic expression, and I love the community of individuals who share in this passion.


With all of that said, I'd like to leave you all with a comment that Sherri Lynn Wood left on the blog post that sparked this post. I think it encapsulates perfectly the whole point of this post:
"The fabrics we use in our quilts are the narrative, plot, place, and the characters of the story. Each fabric has the potential of carrying so much meaning or NOT – especially if it’s the most recent color coordinated fabric line out by the latest crafty pop designer."

Wednesday, October 12, 2011

Give Away!! Bright Blocks Need Good Homes

Update: Most of the blocks have been claimed and I've sent out emails to the lucky people to have claimed blocks. Thank you all so much for giving homes to these blocks! Comments have been closed for this particular give-away.

As you all know, I changed directions on my Farmer's Wife Sampler. As a result, I have several blocks that need new homes and I'm more than happy to drop these babies into the mail this weekend to someone who will love them.

So, the rules. Photos of the blocks up for grabs are below. One block per person. First come, first served, though I have to limit this particular give-away to U.S. residents. Leave a comment telling me which block you want. I will follow up to your comment with an email asking for your snail mail address. This means, if you don't have a Blogger/Google account, please provide me an email address in the comment for me to contact you.
#001 Attic Window
#001 Attic Windows
The orientation on this block doesn't match the book - I downloaded the foundation pattern from the Yahoogroup, and forgot to mirror image this prior to printing.
#002 Autumn Tints
#002 Autumn Tints
For whatever reason, I also paper-pieced this one. Couldn't tell you why now, but I did.
#100 Weathervane
#100 Weathervane
Another paper-pieced block, in which I removed some unnecessary seams.
#004 Basket Weave
#004 Basket Weave
I followed the book lay out for the colors, and it's a grouping of some prints that I just love. No surprise that they're all tone on tone, right?
#010 Bowtie
#010 Bowtie
Again, paper-piecing to the resuc. I was kind of retentive about how the white patches met in the middle.
#008 Bouquet
#008 Bouquet
I'm not sure what I was thinking when I finished this one up... I'd meant for the pink triangle that's the base of the basket to be the polka dot fabric.
#006 Big Dipper
#006 Big Dipper
Have I told you all how much Quarter Square Triangles can kick my ass? It took me three tries to do this one without a cut off point.
#009 Box
#009 Box
I have an attraction to 'ugly' prints. Plus, the floral print here was on clearance for $2/yard.
#012 Broken Sugar Bowl
Not only do I like 'ugly' prints, I made too many HSTs that finish at 2".
#111 Wrench
#111 Wrench
And, finally, the end of my mistake. Yeah.. Way too many of that unit.
#029 Economy
#029 Economy

Bright screaming pink... I'm not even sure why I bought this fabric in the first place. I'm almost out of it, thank goodness. It only took five years.

#061 Northern Lights

Funnily enough, I love both of these fabrics... by themselves. Together? Not so much.

#092 Streak of Lightning

I love, love, love, this polka dot fabric. I should have purchased the whole bolt when I saw it in the shop.

Well, there you have it, folks! Thirteen Farmer's Wife Sampler blocks, all in need of new homes. For those of you not doing the FWS, but just like the blocks, these finish at 6" X 6", so they're actually 6.5"square with the seam allowances.

Tuesday, October 11, 2011

Farmer's Wife Frenzy

Two Sundays ago, I spent part of the day at work pre-cutting a bunch of Farmer's Wife blocks. Football season has started, and Janesville is full of fans, both of the Packers and the Bears. On top of that, the Brewers are doing exceptionally well. This meant that the mall emptied itself of shoppers as game times drew near on Sunday.

And. holy shingles! This pre-cutting thing works miracles. In three days, I made several blocks:
#011 Broken Dishes
#011 Broken Dishes
You all might have noticed that I like to repeat 'themes' in my fabric selections. This time it was circles. And that navy fabric - it's really a pretty royal purple.
#006 Big Dipper
#006 Big Dipper
Quarter square triangles are not my favorite, and I'm trying desperately to ignore the one point that got cut off in this block. I don't know if I'll continue to succeed. However, I love this combination of fabrics.
#21 Contrary Wife
#021 Contrary Wife
I'm trying to add lighter blocks in as I go along... And I've repeated the theme and fabrics. I just couldn't resist. Plus, fussy cutting makes its reappearance. Again, I would never do it for an all over quilt top design, but one off blocks... it's kind of fun.
#084 Spool
#084 Spool
I'm actually really disappointed by this block. It needs more 'pop' in the color department. I'll probably be remaking this one. It's just too 'blah'. It's not helped by the very muted tones or the fact that the relative size of the prints is so close
#003 Basket
#003 Basket
The handle is hand-appliqued. This is another one I might take the time to redo, mostly to secure the ends of the basket handle better, burying them in the piecing. I didn't mind the hand applique - that only took about fifteen minutes one morning.

I also precut Buzzard's Roost, but I wasn't happy with it, so I didn't photograph it. It's perfectly pieced - I just made a mistake when cutting and reversed my two fabrics so the values weren't placed the way I want. It's simple enough to rotary cut, so when I have some free time to pre-cut again, I'll add that to the to-do list.

While I was at the monthly Stitch 'N' Bitch, I paper-pieced two more blocks:
#005 Bat Wing
#005 Bat Wing
For this one, I used the fat quarters of Innocent Crush I received from my DQS 10 swap buddy. I love the look of this line, and the colors - it's just that the prints are freaking HUGE! And, hello! I work small blocks. I just don't dig the big blocks. So anyway, some more fussy-cutting to get a sense of movement. At the risk of being risque, Sandi thought this one looked like an especially talented stripper had gotten her tassels going in opposite directions.

Or an owl.

I'll let you all decide.
#001 Attic Window
#001 Attic Window
Silly me! I once again forgot that the paper-piecing foundations available at the Yahoogroup aren't mirror-imaged so that the blocks come out they way their shown in the book. Still, not re-piecing this one, as I'm pretty happy otherwise. That awesome mustard green makes another appearance, along with a new acquisition in the form of that bright pinky-purple. It's actually a gradient fabric, but you can't see much of change in color, except for the top right corner.

So, seven more blocks into The Farmer's Wife Sampler. That brings me to seventeen completed. (Eighteen if I could the Buzzard's Roost that I just don't like.) I have about another dozen blocks' foundation patterns already printed, so expect a slew of paper pieced blocks before I move on to pre-cutting more rotary friendly blocks.

Sunday, October 2, 2011

Weekend Recap

I've been a good little worker bee this last couple of days.

I picked my fabrics for the Test Your Skills Sampler. I designed my quilt top for the Modern Quilt Guild Kona Solids Only Challenge.

I even got some actual sewing in. I made the four 3" nine patch blocks for TYSS, and half the large snowball/nine-patch block. I have to re-do the snowballs - my piecing was somehow inaccurate, and they didn't match seams correctly with the nine-patch blocks. I'm anal enough that it just wasn't acceptable, so I threw the boo-boos in the scrap basket. Since they're just nine patches, I didn't bother to photograph them. When I get a little further into the TYSS, I'll post photos.
#071 Puss in the Corner
More fussy cutting, and that awesome Walmart fabric makes another appearance. Sadly, I even got anal retentive about how I cut the dots.
#093 Swallow
#093 Swallow
I deliberately went with lower contrast fabrics with this block. I have a lot of very dark, and a couple of very light, blocks. I need some middle ground to help keep the eye moving over the (eventual) quilt top.

Both prints are Walmart fabrics, and I'm still having some fun playing with fussy-cutting. I've determined that I would NEVER do it for a large quilt, but one off/sampler blocks, I'm okay with fussy-cutting.

I've also gone and pre-cut the fabric for another fix or six Farmer's Wife blocks, so I'll be ready for another round of sewing. I went through the book, did the quilt-y math and scribbled my own rotary cutting directions onto each page. I've also gone and denoted those that I feel need paper-piecing. In addition to those, I've found that there are a number of five by five grid blocks which would require me to cut things at 1/5 of an inch. The very idea makes my head hurt, so I'm going to be figuring out if I want to substitute blocks. 
string_blocks
I have a ton of scraps, a good portion of which I reduced to strips about a year ago. My sampler projects aren't helping the scrap situation much. Okay, not at all. I've been generating scraps far faster than I've been using them. I determined that it was time to start working on my strip quilt.

Sometime into one of the more recent batches of Farmer's Wife blocks, I realized that I should just use the string blocks as my leader/ender project. *facepalm* Why didn't I think of this before? These blocks would have gone so much faster!

Two days, nine blocks, one design and a bunch of pre-cutting done. It's been a good weekend.

Saturday, October 1, 2011

TYSS Fabrics Selected

My Kona Lake arrived on Thursday of this past week. Yes, in fact, I had ordered it two weeks ago. fabric.com mistakenly sent me a truly hideous six yards of some slate blue print that had different pairs of ice skates all over it. Actually, there really aren't words for me to describe this stuff, so a photo will have to suffice:
Needless to say, I was pretty well horrified. Any person that I've sewn with or has seen my stash knows that I'm just not a novelty fabric person. Thankfully, fabric.com switched out the fabrics with no fuss, but I was delayed in picking out my fabrics as a result.

Now, I was going to work on my Kona Solids Challenge today. Upon sitting down to actually sew some of it, I realized that I just didn't feel like I had enough different fabrics to produce the right number of gradients.

So, yes, I did go and order two more Kona Cotton Charm packs, and the Kona Color Card, thank you very much. Yes, I know that my self-control sucks. What do you expect? I'm a quilter, which means that I and a serious fabric addiction go hand in hand. Needless to say, that particular challenge project is being put on the back burner until my goodies arrive.

Moving on...
Using the highly scientific method of draping fabric over the back of my couch, I first auditioned the blocks I'd made for the Skill Builder Series tutorials. I was quite pleasantly surprised to find that I really liked how the majority of them worked. The fabric on the far right is my binding fabric.
I converted the photo to black and white, so that I could judge values. I was surprised to find that I liked having the yellow fabric. My eyes had deceived me, and it's actually lighter in value than the Kona Lake. Not by a lot, but enough to make a difference. This made me decide against the fabrics in the far left block. That salmon color just gets lost against the Kona Lake.

I played a little more, a process which I did not document in photos, but should have... I ended up discarding the yellow floral entirely, and switching in another yellow. With the exception of the brown background dots fabric, all of my selections are tone on tone, or nearly so. (Gee, what a surprise, right?)
I knew right away that I wanted to keep the three fabrics on the left. Despite the similarity in color to the background, I opted for the teal on the far right. I needed something other than that spruce green to bring some balance to the otherwise very warm tones I'm using. The yellow floral got switched, as I'd mentioned before, but mainly because I like the idea of having three prints that have a circular motif to them. I played with a couple of different shades of wine red (I have a lot to pick from), but ultimately went with the print shown above because of the lack of gray in the color. I needed something fairly pure in tone to foil against the very vibrant orange.

It's serendipitous that the fabric that I picked for the binding coordinates so well, especially considering that I didn't have any of my blocks with me at the WI Quilt Expo. And I totally winged picking the color of my background, just praying that the Kona Lake was close enough to the very pale aqua in the striped fabric that I wouldn't notice a difference. I got really lucky.

 And now, maybe I can actually go sew something!

Fresh Sewing Day

It's the beginning of the month, and I thought I would start sharing the culmination of the previous month's sewing from now on. Mostly so that I can look at my lack of progress and kick myself in the butt to do more.

My sewing time is aggravatingly limited - working two jobs will do that. But I am working on stuff, which is a lot more than can be said for previous months.

I can actually say that I had a finish last month, which is pretty amazing. I'm back on the Farmer's Wife blocks. Today, I'm starting the Kona Solids Challenge. I didn't work on my Double Wedding Ring at all; shame on me! I did clean up my sewing room, which has facilitated sewing.

Mrgh.. I look at my progress for September, and it feels pretty meager... I'm going to go sew something now.