Sunday, April 3, 2011

PM/GC Skill Builders Series Part 2A - Buying for the Stash

or, as I like to put it:

MOAR FABRIC!!
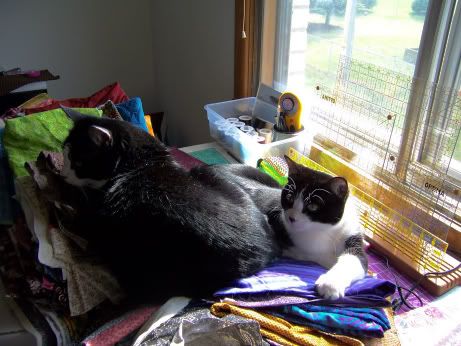
... for my cats to sleep on
Teehee.  Sorry.  I had to do it.

Check out Sandi's post on this same subject here.

Buying for one's stash is an incredibly personal decision, dictated by several factors.  Time, money, our mood at the moment, current fabric availability, current fabric trends...  I could probably go on.  And on.  And on.

Anyway, I decided to take a slightly different road from Sandi's post on buying for the stash.  She goes into a lot of great details, that you don't need to read twice.  I decided to discuss what makes me buy something for my stash, so let's dive right into that.

First of all, I've really only been buying with the intent to stash for about five years.  'Intent to stash'.  What do those words say to me?

When I buy fabric with the intent to stash, that means that I know darned well that I'm not going to cut into in the near future.  Near future being in the next week or two.  If I'm going to be cutting into it within that time frame, I'm buying with a project in mind.

But I digress... Back to intent to stash.

I know I'm not nearly as bad as some individuals about buying fabric just to have it.  I'm actually pretty proud of that.  I don't have unlimited space - I live in a two bedroom apartment that I share with my husband, son, and three cats.  So, I have to be pretty picky about what I pick up for the stash - I have to have a place for it all to live.

However, I'm right with Sandi when it comes to the things I look for when buying for the stash: Color, Value, Print, Scale and Quality.

Let's start with Quality because it's a quick and easy one to get out of the way.  I do not buy exclusively from quilt shops.  I do a lot of purchasing from my local Joann's, as well as from online discount retailers like fabric.com.  But with that said, I do my best to ensure that what I bring home isn't something I'm going to regret.  If I can see through, it doesn't come home at all.  I like cottons with a smooth finish and clean printing.  I like it to have weight to it, a solidity if you will.  Now, I know that sounds a lot like Sandi, but I think it bore repeating.  Most importantly, be happy with what you take home.

I can't comment on the lighter weight fabrics that have become popular, like voiles, because I haven't used them.  I'll be honest though... I'm not especially jazzed to try them either because I haven't seen any that really trip my trigger.

Let's move on...

COLOR


I love color.  It's the motivating factor for me when I purchase fabric for my stash.  But because of that, I can go very long periods without buying for my stash.  This is due to the fact that there are 'in-season' colors as well trendy colors.  Past years where pastels or were super hot - I pretty much stayed out of fabric stores.

The top two shelves contain everything that is one full yard or less, organized by color.  Since I do a lot of scrappy quilts, I buy a lot of fabric at this quantity.

The third shelf contains the fabric that is over one yard in length.  I don't have as much there, at the moment.  The shelf was full last summer.  I used quite a bit of yardage from the stash for the Christmas Cactus Quilt and for the Piecemeal Quilts Friends and Family Basket Blocks top.

As you can see, I don't buy a lot of brown or yellow.  The yellow thing is due to the fact that I really don't like bright yellow.  I prefer mustard or turmeric yellows, shades that start veering into brown and rust.  Brown is simply not my choice of neutral, though if you look in the top left corner, I clearly have a white/cream and gray/black obsession.

Really, if I like the color, I'm very likely to take it home, as evidenced by the piles waiting to be processed into the shelving:
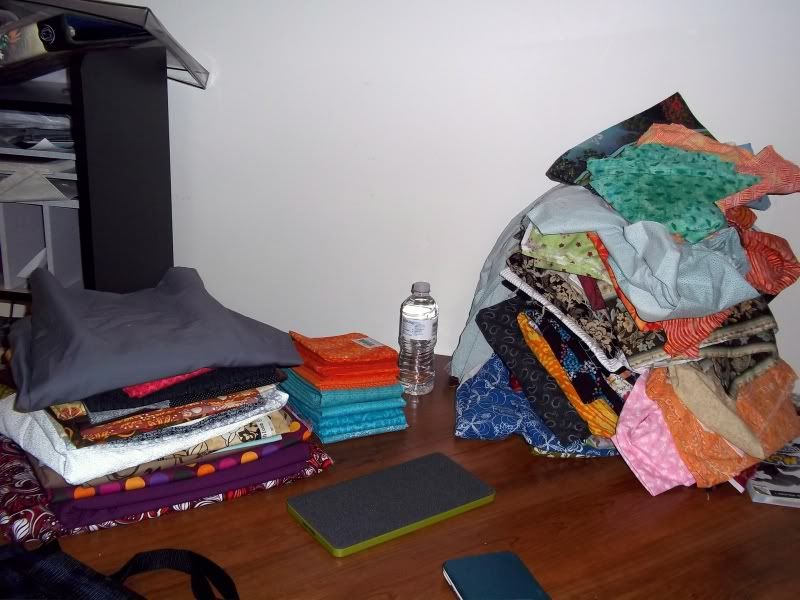
About six months worth of purchases - because I've been LAZY 
I've been accused of liking ugly fabrics because I tend to buy some really off the wall shades.  But that's because I like to include zinger fabrics.

PRINT and SCALE


These are one section for me, because they're inextricably linked in my head.  I love solids, but they make up less than 5% of my fabric purchases over the course of a normal year.  2011 is the exception to that, because I am doing a Dear Jane.


I buy a lot of tone on tone as you can see from these close-ups of the first two shelves of my stash:

I buy them in both small scale and medium scale prints.  Occasionally, there's a large scale tone on tone, but that's not common for me.  Honestly, this buying habit is something that seemed pretty unconscious for me.  On the surface, they're just what I'm attracted to.

Thinking about it though, I realize it is actually a conscious choice.  Buying primarily in the tone on tone, or 'reads as solids' group, I have of a lot of options open to me.  I normally piece in smaller units, so I don't lose the pattern at all.  My stash can go into a wider range of quilts.  Scrappy quilts are much easier.  These purchases tend toward more versatility, and age better than other prints.  I regret far fewer purchases this way.

When I do purchase large scale prints:
They are almost inevitably very limited in color palette, and they're something I use as a leaping off point for pulling the other fabrics for a quilt.  I have fewer colors to worry about matching, which is awesome as colors go in and out of fashion.  Finding a zinger fabric (something that stands out to draw the eye) is so much easier, because I simply pick that's not even in the large scale print.  For instance, the fabric on the far left with the yellow, gray and white on the black background?  I'm thinking aqua would work well as a zinger.

VALUE


Because I'm attracted to so many different colors, in such a variety of shades and tones, I actually have a wide range of values to work with:

Value is just as important as color, in order to create a sense of movement in a quilt.  Sandi showed off some great examples of this in her post, so I'm not going to re-illustrate for you.  Instead, I'll just encourage you to purchase fabrics in a wide range of colors and values - you'll be so glad you did, in the long run.

Now, you'll notice I didn't touch on pre-cuts, or vintage, re-purposed fabrics.  I don't buy pre-cuts.  This is because pre-cuts highlight a single line, in all the color ways.  I find that tremendously boring.  I also end up feeling extremely limited and frustrated by the fact that they are pre-cut.  I'd much rather be the one to decide how my fabrics are sliced and diced, and I dislike losing the nature of a large scale print to a small shape.  As for vintage or re-purposed fabrics, typically, they're not something that I like.  Most old bed linens tend to be large florals in pastel shades.  That's just a double whammy of 'no' for me.

MARKET & FASHION TRENDS

As a buyer, it pays to be aware of changes in the market.  You want to know when the stuff you like is moving out of stores.  I take that as my last chance to stock up.  Keep an eye on your local department stores and clothing boutiques to see when displays change, and when seasonal goods start getting shifted around.  See what colors are being used in clothing and home goods ads to determine if you need to start stockpiling the stuff that you liked but either didn't buy a lot of or put off.

I personally don't keep tabs on what fabric is coming out when, but that's also a very good indicator of when these industry mandated change overs in trendy/popular colors are about to take place.  When retailers offer an additional markdown on their clearance fabrics is a good sign that an influx of new product is about to hit the shelves.

QUANTITY

I very rarely buy less than a yard of whatever fabric happens to make it into my cart.  I don't make small quilts for myself.  I prefer them to be a generous lap-sized quilt at the least, but prefer something that can fit on my queen size.  If I'm looking at a large scale print, I'll almost always buy two yards, so that I can retain as much of the image as possible, as well as to incorporate it in either the backing or a border.

I've been known to buy fat quarters, when there is really no other option if I want to obtain a certain color.  I'm not really into them, because of their cost.  Since I'm careful to buy my yardage at sale prices, fat quarters actually end up being prohibitively expensive.

Hopefully, this all will help you the next time you go fabric shopping.  If I need to clarify anything, please leave a comment and I will get right back to you.

Awesome Give-Away

Run and check out this give-away!


http://brynalexandra.blogspot.com/2011/04/april-giveaway.html

IT BEGINS!!!

Welcome to the Double Wedding Ring Quilt Along!  Are we ready to rumble?  No?

That's okay, so long as you're ready to tackle my favorite classic quilt pattern.  No, I am decidedly not ashamed to admit this.  I made my first DWR completely by hand, piecing and quilting.  I started it just hours before I met the man that I married.  It's his favorite quilt, and he says that he just feels loved when he's wrapped up in it.  Alas, that first DWR is showing its age  (we've been together for going on nine years now), and desperately needs to be retired so that I can continue to look at it and enjoy the memories it calls up.

That's actually what's prompted this particular Quilt Along - I need a new DWR, and I do much better with actually producing something when there's a deadline.  Imagine that!

Just some additional information and disclaimers:


I am going to do my best to make this as painless as possible.  However, this is the first quilt along I've hosted.  


I'm going to assume that all of us doing this DWR Quilt Along are familiar with the necessity for accurate cutting and a consistent 1/4" seam.  All of the products and piecing methods showcased here rely on a 1/4" seam.  

I struggled with the idea of providing yardages versus total number of pieces, or attempting to include both.  Why was this such an issue?  Because, traditionally, a Double Wedding Ring is pieced from scraps, with a single background fabric.  However, many of us are attracted to a more minimalist color scheme.  So, what I'm going to do, is provide a total number of pieces needed, for each shape, and then the overall yardage for that shape.  I leave it to you to decide if you will do a single background color, as well as how many different fabrics you will use in the arcs of the rings.  It should be a simple matter of division, with possibly a little extra yardage thrown in for oopsies, to figure out how much each fabric you select you will need.  


For any assistance, you may contact me via comment or e-mailing me directly (please ensure to put DWR Quilt Along in the subject line), or utilize the Gray Cat Quilts Projects flickr group.  Using the flickr group might mean that someone will have an answer for you before I get to my computer.  


Now, let's move on to the interesting part of things!  The anatomy of a DWR block, so that you all know what I'm referring to in future posts:
Those of you who have an Accuquilt GO!, you've got it easy.  Your supply list is as follows:

Accuquilt GO!
GO! Double Wedding Ring die set (55078)
10" square GO! cutting mat (55111)
sewing machine
scissors or thread snips
thread (use what you're comfortable with, both for piecing and quilting)
sewing machine needles (some for piecing, some for quilting)

Now, I'll be honest - I had a chance to play with my DWR die set yet, so I'm not sure what the finished size of a block is using it.  I guess-timate (so scientific, I know!) a top size of about 62" square, based on knowing that the die set uses the 10" X 10" cutting mat.  However, I did figure out exactly how many pieces would be needed for that size top.  The yardage given includes

If you would like to make a larger (or smaller) version, please refer to the GO! Fabric Reference Chart, available as a PDF download here.

Piece Name     Qty. Needed     Total Yardage
Arc Centers            504                  5 1/8
Arc Ends                336                  3 1/4
Corners                  168                  1 1/2
Melons                    84                   1 3/4
Centers                    36                     3    

For those of you who do not, I am providing EQ7 templates for you to print and use, as well as a supply list for that.  However, I highly recommend obtaining a template set for accuracy's sake, not to mention making this project much less time consuming and irritating.  The voice of experience is talking here - that first DWR?

Yeah, I made that by tracing around all of the templates that I made from heavy weight plastic and then cutting all of the pieces out with scissors.  Definitely not fun.

I digress...

Those of you using pre-made acrylic templates, like Marti Michell or Omnigrid's Double Wedding Templates, your supply list is as follows:

your acrylic templates of choice
sewing machine
scissors or thread snips
thread (use what you're comfortable with, both for piecing and quilting)
sewing machine needles (some for piecing, some for quilting)
rotary cutter (I recommend a smaller one, like 28 mm)
rotary cutting mat

For your yardage, and required number of pieces, I refer you to your instruction booklets.  Both the Marti Michell and Omnigrid booklets list several different sizes and the numbers of pieces and yardage for each size.  

For those of you needing the EQ7 templates, and yardages - I have to apologize at this moment.  I don't have my printer hooked up, and apparently the program requires that to print templates.  Plus, I just realized at this moment that I should have been quite a bit smarter about how I set up a DWR in EQ7 in order to get yardages.  As soon as I can get a fresh look at this in the morning, I will correct this oversight.  Again, my apologies - I didn't forget about you - I got tired and stupid. 

On this note, I'm going to have my very belated dinner, and head to bed.  The blog button for this quilt along can be found in my side bar.  Thank you so much for you patience.  I'm gonna go crash.


Edit 4/3/2011 -

Okay, the supply list for those of you working from the EQ7 templates, which will have to wait until tomorrow.  I have no ink in my printer :P


sewing machine
scissors
thread (use what you're comfortable with, both for piecing and quilting)
sewing machine needles (some for piecing, some for quilting)
template plastic
fabric marker for tracing the shapes out onto fabric (I personally prefer the Sewline Mechanical Pencil)

Yardages for a quilt top finishing at 68" X 68":

Piece Name     Qty. Needed     Total Yardage
Arc Centers           1792                4 1/4
Corners                  448                   5/8
Melons                   224                  2 1/4
Centers                    49                     3   

Now, as you can see from the total number of pieces, there's a reason I highly recommend pre-made acrylic templates.  

As soon as I get a break tomorrow (I'm working open to close, but most of it at the mall), I will take care of getting the templates uploaded and available on this post.

Wednesday, March 30, 2011

Another DWR Teaser

This is what I'm thinking of doing, but I'm so tempted to throw the towel in on this color palette and go with the black background with pink and aqua circles.  This just doesn't have the same visual pop for me... Hmm...  What if I go with purple and yellow?


Now, I'm sure you've all noticed that I'm working these samples up in fairly limited color palettes.  Why?  Because I get really, really bored dropping different colors into EQ7.  I'm not kidding, lol.  I love the program, but I spend 90% of my day working on the computer, so I tend to try to transition from work to my sewing machine with as little computer time as possible.

Also, I like the look of the limited color palettes.  For me, it does a lot to modernize this classic quilt pattern.  And, honestly, I've done a scrappy DWR, so I'm not eager to re-tread creative ground:

Obligatory Cat Cleaning Herself Included
But don't let my current color freakiness off put you to a scrappy look.  Take a look at the following mosaic for some further color inspiration:

DWR_Mosaic


Check back on Saturday, 4/2/2001.  I'll be posting fabric requirements and a recommended supply list for the quilt along.  I'll also have a blog button up if you'd like to advertise your involvement in your own side bar.

Sunday, March 27, 2011

The Basics of Pinwheels...

...or, Two Ways to Piece HSTs


For two more ways to piece HSTs, check out Piecemeal Quilts.


My first (and honestly, long abandoned) method for HSTs is about as traditional one can get, short of fashioning templates out of cardboard and drawing the shapes out onto the fabric back.  Thankfully, due to rulers and rotary cutters, we don't have to go quite as traditional as we could:


First of all, some basic math - or the 'magic number' for Half Square Triangles:


7/8"


That's it.  Add 7/8" of an inch to the desired FINISHED size of your HSTs.  In today's case, that means that our starting squares should be cut at 3 7/8" by 3 7/8".  Notice the words 'should be'.  I'm not, nor will I ever claim to be, a perfect cutter.  Mistakes happen.  I personally add at least the 1/8" needed to bring it to an even number, and trim down.  I add more leeway if I know I've got the extra fabric.  So, go ahead and cut two squares each of your light and dark at 4" by 4".  In my case, I cut one square each of the two prints, and two squares of the dark brown solid:
Now, go ahead and cut these on the diagonal.  Yup, just slice those babies in half.
Pair up your light and dark halves and sew them together.  Be careful!  You are now sewing on the bias edge - this means that the fabric can stretch, so do your best to not pull the fabric.  Just let the feed dogs take the fabric as naturally as possible.
Snip your pinwheel quarters apart and iron as desired.  I'm a seams open kind of gal, but don't feel like you have to do the same.
 
Lay out your sub-units, ensuring that the pinwheel is spinning correctly, with the print fabric leading the whirl around:
Stitch together - I chain piece.  Sandi offered an excellent piece of advice, about leaving the two halves of the pinwheel together, to ensure that they continue to face the correct directions.  I'd never thought of that.  Sew your two halves together.  If you've ironed your seams to one side, I suggest referred to Sandi's tutorial.  She offers some excellent advice about nesting your seams and how to not cut off the points of your triangles.  Since I press open, I have to trust that my 1/4" seam is accurate.  Anyway...

Voilà!  Pinwheel!
Now, onto the second method, which I prefer by far:

Cut a 4" X 16" strip each of your light and dark.  In my case, I cut two strips of each of my prints at 4" X 8", and two strips of my solid at the same size.
On the back of your lighter fabric, draw lines at each 4" mark.  Then draw in the diagonal lines from corner to corner in a zig-zag.  For the moment, these are your guidelines, but they will be your cutting lines later.  You can opt to draw in the sewing lines, 1/4" away from your cutting lines.  If you do, you'll notice that this looks an awful lot like Sandi's Triangle Paper.
Stitch 1/4" on either side of the lines that you just marked, following the zig-zag pattern:
Slice along the 4" markings:
Then cut along the diagonals:
From here, continue on with the finishing steps from the first tutorial above...  Press your new squares open, and stitch your pinwheels together.  Having done both methods here, I think you'll see, easily, why I prefer to stitch my HSTs in strips.  I'm not piecing on the bias, so there's less distortion.  I'm not chain piecing so much, and seams are far more accurate this way.


If you've followed Sandi's tutorial, here, then you'll have four 3.5" pinwheels that you can make into a 12.5" block. My block:
Have fun with this! And if there are other topics you'd like to see covered very soon, leave a comment!

Wednesday, March 23, 2011

EQ 7 is Crack....

So here's a Double Wedding Ring teaser:


I love the way the colors scream out of this one.  If I wasn't so sure I wanted to use grey for the Double Wedding Ring Quilt Along, I'd switch gears right now.  (Besides, I already bought the fabric...)

Monday, March 21, 2011

A Start on Jane

This has been an extraordinarily productive weekend for me!  Sunday evening, I cranked through six of the Dear Jane Blocks.  I have to re-do one of them - I'm not sure how it ended up the way it did, but it's clearly in need of replacement.  But that's a task for tonight.  I forgot to bring Fabric Color 7 with me to re-cut while I'm at lunch.

I-2 Kaye's Courtyard
A-6 Uncle Homer

H-13 Farm Field
C-1 Trooper's Green Badge

I-3 Family Album
I-6 Adelaide's Apron Strings

Fifteen more and I'll be caught up with Sandi!  Which is the goal of course - I hate being behind.  And so long as I keep pre-cutting fabrics during my odd moments of quiet, I'll get there pretty quickly.  I'm hoping to actually be caught up by the end of the week -  there's a quilt-along I'm seriously thinking about joining in on:

block2
Beck of Sarcastic Quilter is hosting a paper-piecing quilt-along.  The block isn't an incredibly difficult one (thank goodness - 'cause I kind of burned myself out on stupidly intricate paper-piecing recently - and on a failed project even), but it lends itself to a lot of very interesting layouts.  Check out her introductory post here.  Beck gives you a supply list, several layout and color options, as well as yardages.