Friday, July 22, 2011

DWR Construction Instructions

I finally sat down to take photos of piecing a Double Wedding Ring. I skipped the mind-numbing chain-piecing portion of the sequence. Why? 1843 individual pieces, that's why. I buckled down, and forced myself to piece the arcs before allowing myself to start piecing rings.

The photos will, hopefully, guide you through the process without too much confusion.  You'll go from:
to
Look at the top photo - with the green arc, I've already attached the the patches that complete the football when sewn on. There's no reason to do a Y-seam here, with some planning ahead.

I always attach the short arc to the melon first. Find the mid-line of both your melon and, in this case, the orange arc. With GO! cut pieces, it's very easy. There are notches to mark those points. If you cut your pieces out from templates, you likely won't have those. I would fold each segment in half and press the fold to create a marker for yourself. Alternatively, you can draw the mid-line or eyeball it.

Once you've found your center, align your pieces like so:
Put a pin through both pieces, vertically, along the mid-line. Then, you'll want to pin each end of the melon onto the arc segment. Having said this, the tip of the of melon should protrude past the end of the arc segment by 1/4":
Yup, that's the seam allowance! Pin that point, and repeat with the opposite tip of the melon. Now, pin the snot of that sucker:
I actually prepare about a half dozen of these and feed them through in a chain. Yes, that does make about 90% (or more) of DWRs chain-piecing, but it seems to go quicker via chain-piecing. Sew your 1/4" seam along the pinned edge. I tend to sew right over the pins, removing them only if they promise to be right under my needle as it comes down. Do what makes you feel most comfortable as you sew this seam. Press as desired. I press this seam open myself.

You'll have this now:
Line up the mid-lines of your long arc and the partially completed melon:
Again, pin vertically at that mid-line. Line up your ends and pin those. You will still see the tip of the melon poke past the edge of your fabric:
I failed to take a picture of these segments pinned together, but it works the same way the other side did. Just match your edges and ease the fullness of the larger arc along the curve.
Isn't that pretty? And pretty gratifying too, if it's laying flat and not wavy, bunchy or full of puckers. But wait! There's more.

Take your center and align you the complete football with the center's midline. You MAY mark the point where the two 1/4" seams intersect at the 'ears' of the center. I don't.
Notice that the melon almost extends to the other side... I cannot tell you if other DWR templates/paper-piecing options do the same. It's entirely possible. Pin the midline and line up the top two 'ears' of the center with the seam of the green arc WITHOUT the 'corner' patches that complete the football. Pin those, align your edges, then pin the rest, again easing the fullness. 

Sew your seam. This seam I start and stop with some backstitching. Again, I tend to run right over the pins, unless my needle threatens to bend or break them. Unpin before moving on. Your seam at the 'ear' should look something like:
Repeat the above steps for attaching a completed melon to the opposite side.You should end up with something resembling an apple core shape. I press at this point, because I like things flat. It's probably not necessary to, but I can't swear to it. I will point out that I do not bother pressing open at this point.
One you've got your apple core, find the vertical mid-line of the apple core laying on it's side, as shown above. Match up this center with another completed melon:
Pin that mid-line and then match your ends. Pins those and then line up fabric edges, ease fullness and pin the snot out of these two pieces. Now, when you do this, you want to locate the tip of each 'ear' and give them a little tug so that it's not folded over on itself and the 1/4" seam is where it belongs.
Sew your 1/4" seam. You'll have to be careful that the center fabric doesn't fold in on itself and insinuate itself between pins. Otherwise, you'll have to go back and rip those stitches out, to free the center. Repeat these last couple of steps with the other side. You should end up with a near circle:
That's it! You've completed your first Double Wedding Ring! Now all you have to do is make enough 3/4 DWR to add on to make a complete row:
When I have enough 3/4 DWR to do a couple of rows, I'll you how to stitch the full DWR to the 3/4 DWR to complete rows. From there, I'll show you how to put the rows together.

Sunday, July 10, 2011

Farmer's Wife Quilt Along

Below is essentially the same message that I posted to the The Farmer's Wife Sampler Quilt Yahoogroup, in response to Laurie Aaron Hird's posting regarding the tutorial project that I'd approached her about. I've edited it a bit to address the wider audience that I get with my blog.


------------


Hello all,

I apologize for getting folks' hopes up that instruction for The Farmer's Wife blocks might be offered in a web-friendly manner. I just saw a gap and hoped to be able to fill it. 

Hopefully, you all will be able to find instruction in places other than the Yahoogroup. For my part, I am disappointed, so I'm going to take a break on my Farmer's Wife Quilt. I have to decide if I feel it's worth the time to re-figure rotary cutting directions for only myself. In the meantime, I have a couple of Modern Quilt Guild Challenges due by September and not started yet(!), a Dear Jane in progress, a top to quilt with (hopefully) show worthy skill, and a Double Wedding Ring quilt to complete. I'm hoping to present the latter to my husband for Christmas, which means I need to get cracking!

There are those of who have contacted me outside of the Yahoogroup and Flickr group. I appreciate your kind words and encouragement. Thank you. If you'd like to continue corresponding with me, I'd love it. While I do have sewing groups outside of the internet, quilting is still very much about the community and camaraderie for me. 

Meanwhile, good luck to all of you! I'll continue to poke my nose in the Yahoogroup and on the Flickr group to see how folks are progressing. And, again, if anyone wants to correspond with me, feel free! Just because I'll be quietly attending to other projects doesn't mean that I want to be a loner :)

Jeanne

------------

I'm trying to not feel like the sour grape in the bunch or the rotten apple in the bushel, but I am very disappointed. I derive a great deal of enjoyment and personal satisfaction in helping my fellow quilters. Still, I do understand Laurie Hird's desire to protect her copyright and intellectual property. I'm currently trying to keep this experience from changing me from a "quilter" into a "quitter". I'm trying to put a good foot forward, but honestly, I'm finding it difficult.

So, yes, for at least a few weeks I'll be taking a break from The Farmer's Wife sampler. Still, I bought the book, and I feel driven to complete the quilt, if only in an effort to work through my disappointment. I'm already fairly certain that I'll be changing my color palette from the bright color palette that most of my blocks thus far have been in and focus on a palette similar to the one below:
I've already decided that I have to find a silver metallic cotton to do a flange on the quilt, to remind myself that there is a silver lining to every situation. I'm still looking for one in this situation, but maybe by the time I complete this top, I'll have figured that out.

Those of you who have offered me words of support and encouragement, thank you! I cannot tell you how much I appreciate them.

Now, I'm off to another day of work at the mall.

Tuesday, July 5, 2011

Farmer's Wife QAL - Three More!

Yes, these are that addicting! I'm sure Dear Jane blocks will be that way too, once I'm back into the swing of things with making those. Since all of the Dear Jane blocks I'd made so far are lost to my toddler, I get to start all over. Thank goodness I bought lots of extra fabric!
#111 Wrench
This is the last of my blocks using this particular combination of fabrics. Like I said, I just couldn't bring myself to waste the HSTs. Now, I'm officially sick of them and want to move on. Very simple block; it's a nine-patch grid. No templates or paper-piecing necessary at all. All seams were pressed open.
#061 Northern Lights
Another super simple block, no templates or paper-piecing. Depending on which definition you want to use, this could be a four patch, or an 8-grid.
#092 Streak of Lightning
I couldn't think of any way to make this block in a non-fiddly manner. I simply chain-pieced each line of this block and then sewed those together. I pressed all seams open for flatness.

PM/GC Quilts Skill Builder Series: Part 11B – Drafting

Check out Sandi's post here. Sandi's already covered (thankfully!) copyright and gridded blocks. I'll be covering non-gridded blocks and uneven blocks, and how to draft those.

But first, a few words about being able to draft your own blocks and quilts. I love the freedom that having this skill gives me. I'm far more free to analyze a design and decide just what it is about the design that I love, and what it is about the design that doesn't resonate with me. I'm then able to change those things that don't speak me.

Also, I'm able to simply look at a block now, and know how it's constructed, and determine the best method for putting it together. It's been invaluable just doing the Farmer's Wife blocks - a good portion of those blocks are fully rotary cutter friendly and I don't even have to draw them out at all!

Yes, I do have EQ7 now, and the process of a designing a quilt top is made far easier with that program. However, I can honestly say that if I didn't have a firm grounding in the basics of how quilt blocks are broken down, I would never be able to use the program to its potential. I often, unless I know the block name right away, don't even bother to look up blocks in the program's library. I just draw them in.

That said, let's get to work!

UNEVEN BLOCKS

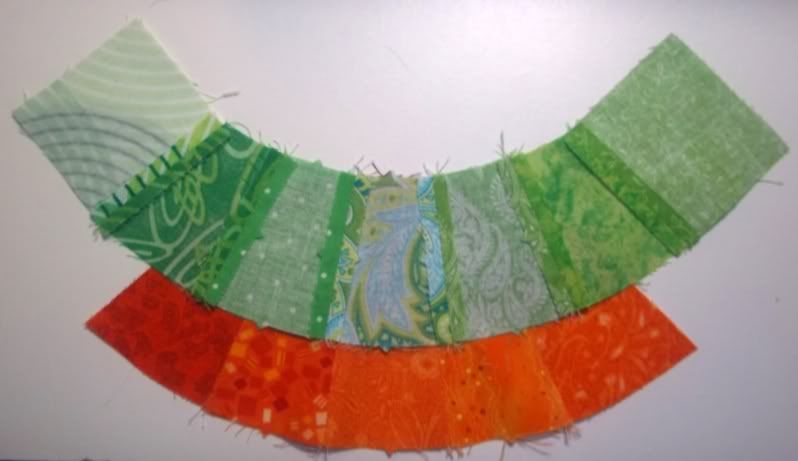
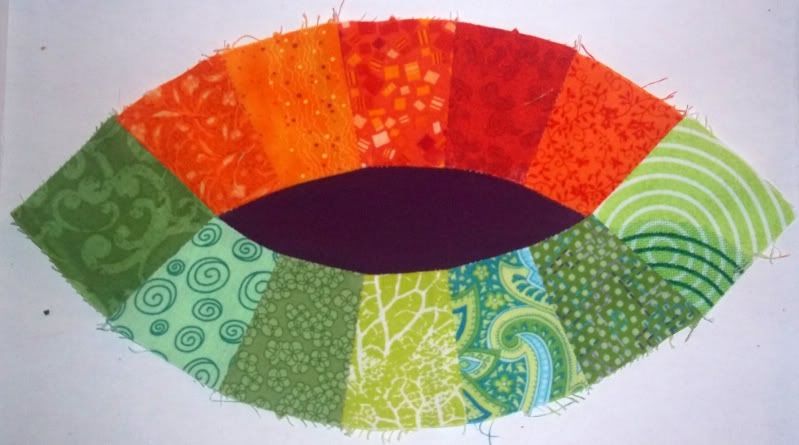
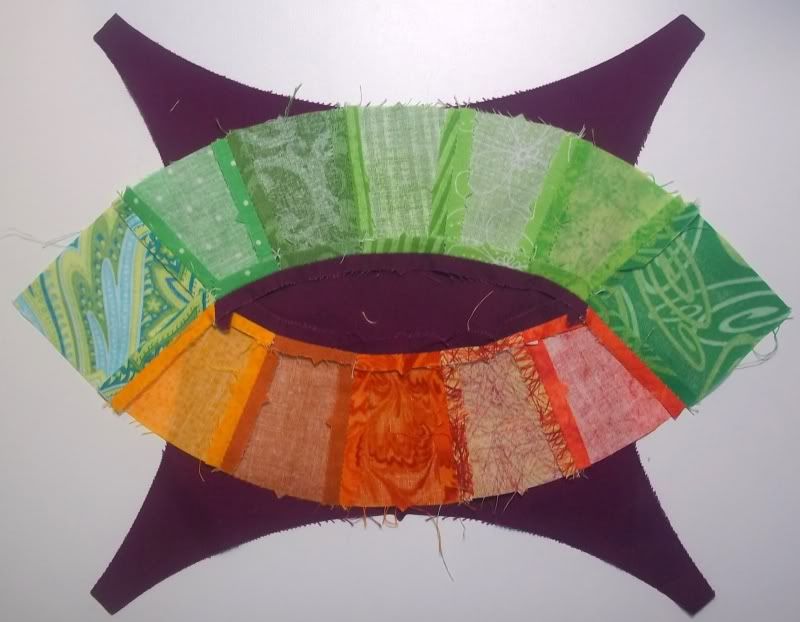
Uneven blocks often look harder than they really are. These are the oddball blocks whose components spill over the grid lines.

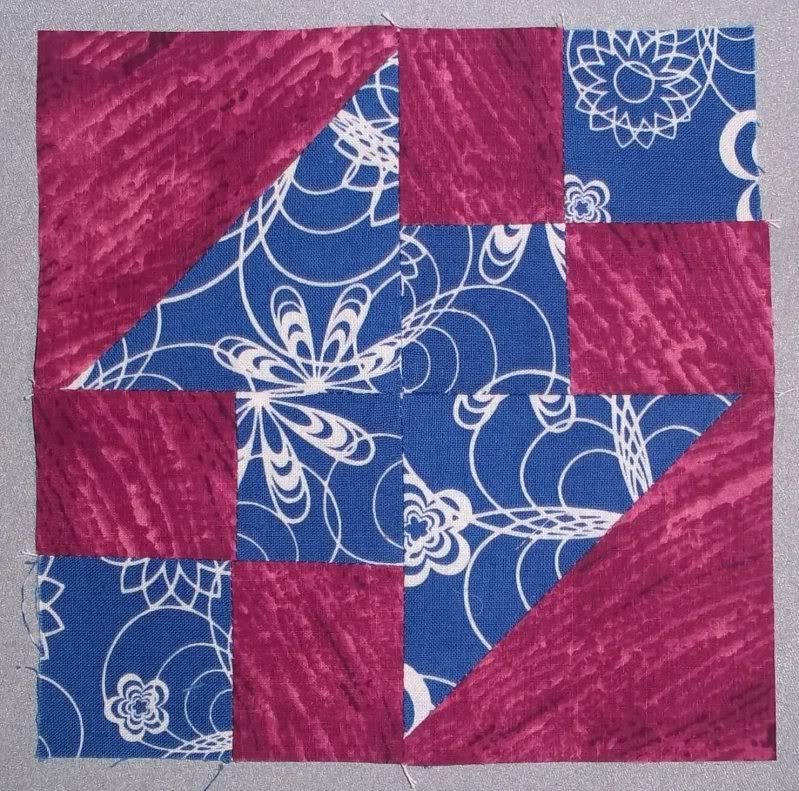
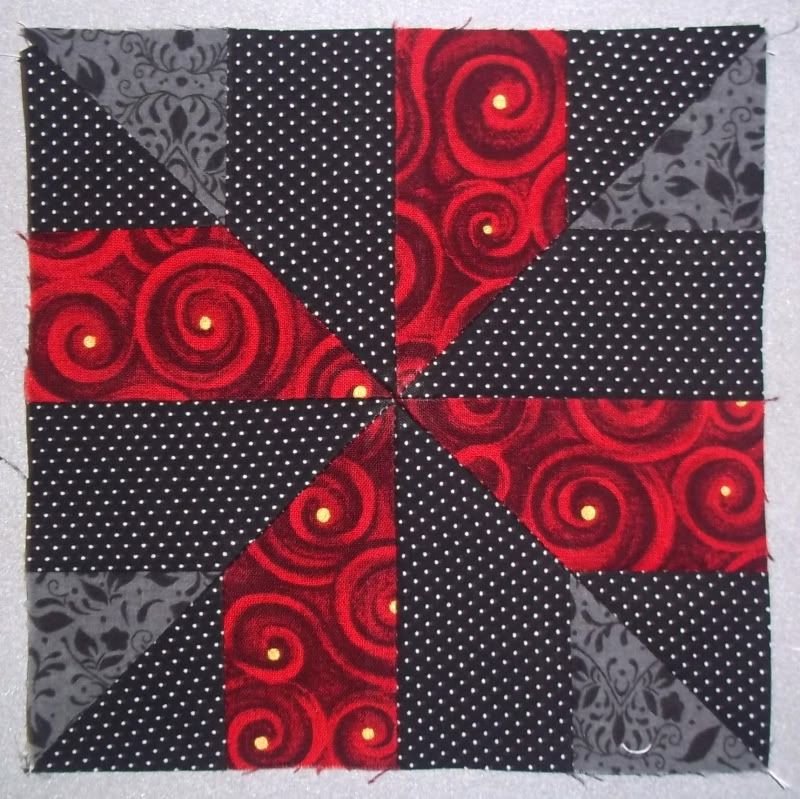
Storm at Sea is an excellent example:
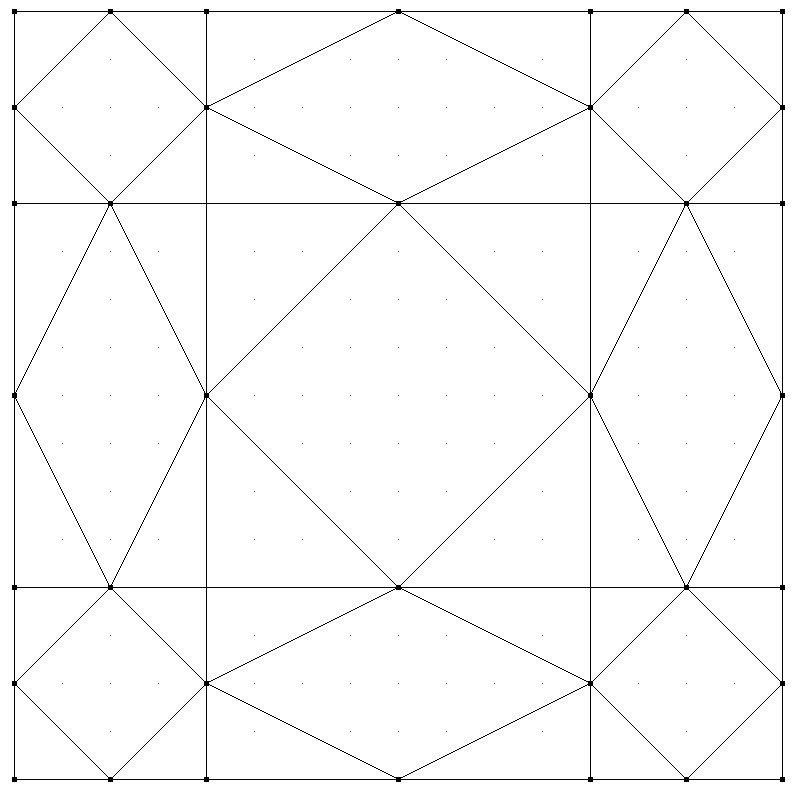
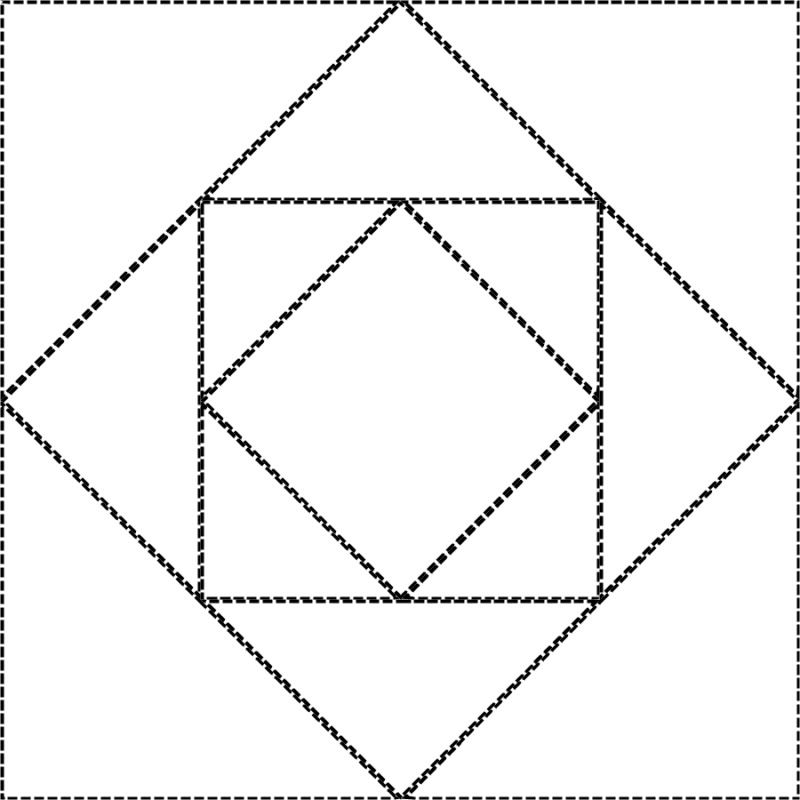
But wait! Take a closer look! This block is perfectly symmetrical. It mirrors itself from left to right, from top to bottom, and from corner to corner. That makes this so much easier to figure out! You know what your center lines are, and now know that it will work best in multiples of four. The magenta diamond in the middle is actually a square on point, so no working with odd angles. Look closer yet, and you can make out four of the major seams.

Now that you know those things about this block, you can derive the following image:
You  can already see the Storm at Sea block emerging, can't you? This block practically does the rest of the drafting for you, as every nearly every shape shares a point:
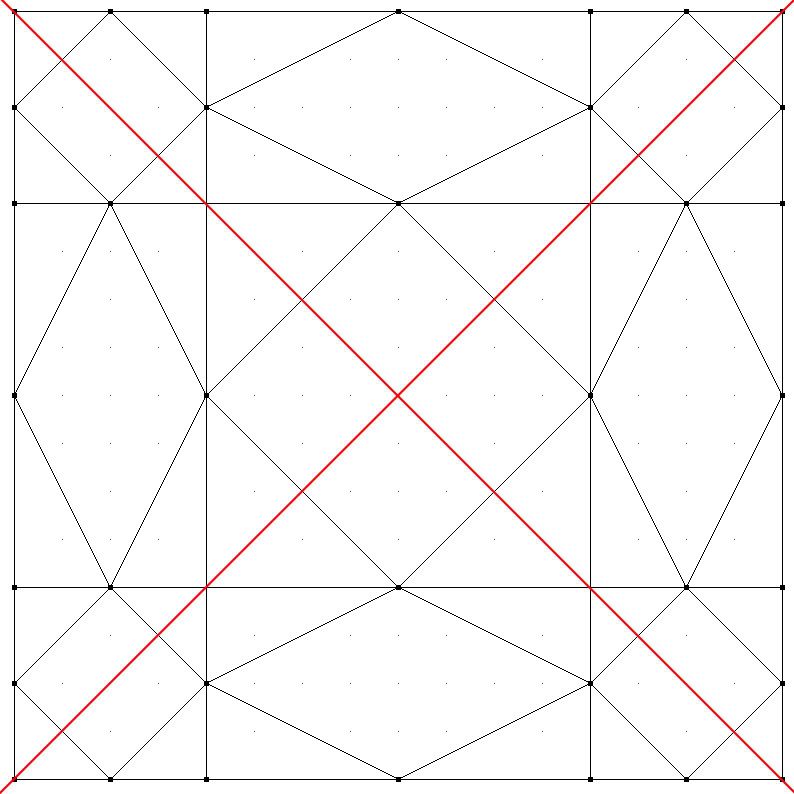
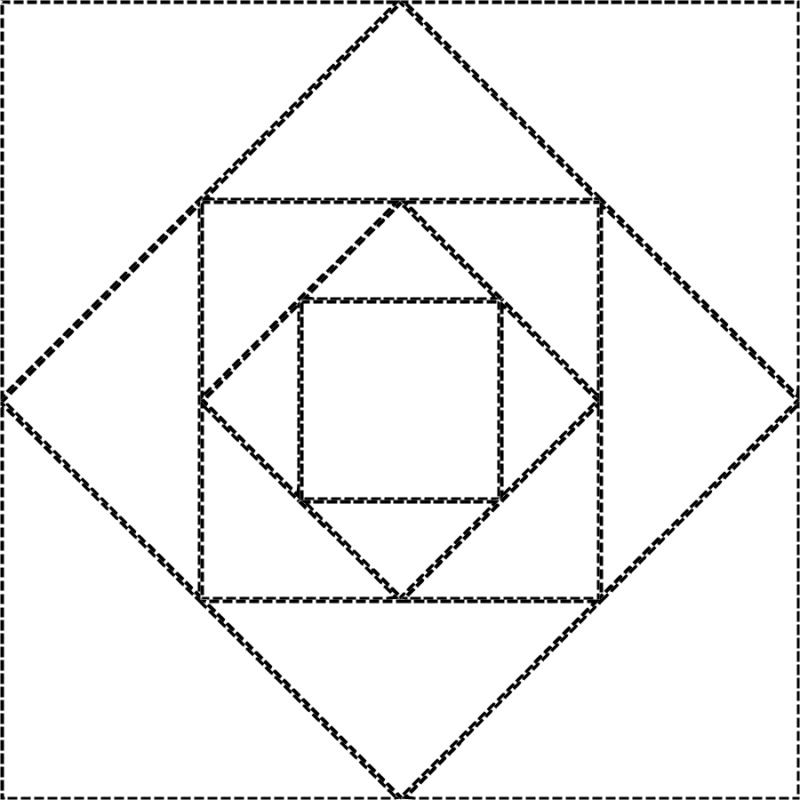
We're nearly there! However, how do we determine the corner points for the last four squares? That's easy! Remember, this block is symmetrical on the diagonal:
That's right. We're cheating. Sort of. Those red lines (which will disappear in the next step) show you at least two of the corner points for each square. And since they're squares, which means that each side is the same length, it's as good as having all four corner points!
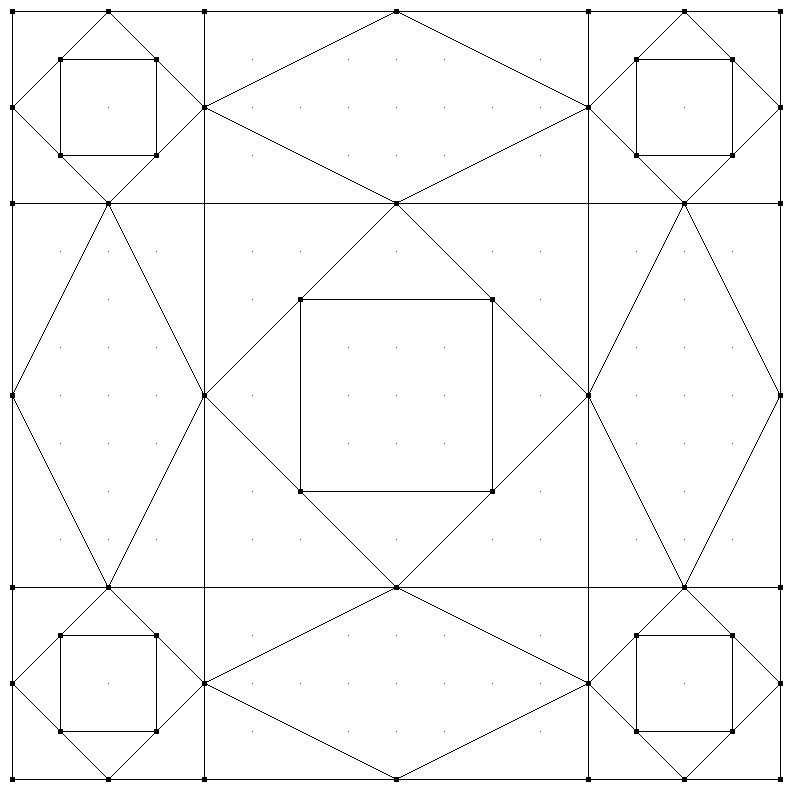
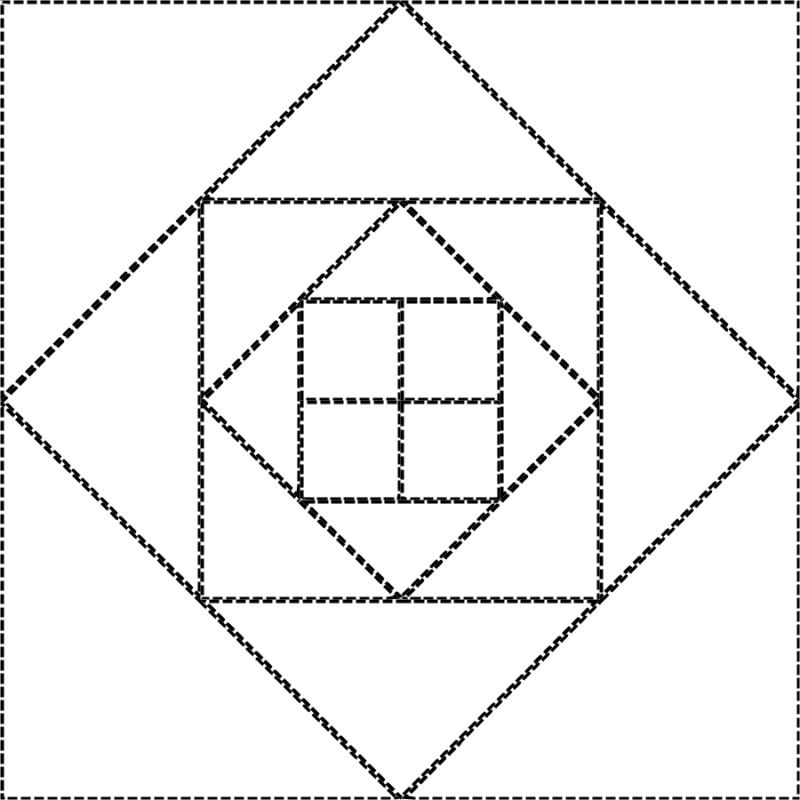
You've just drawn Storm at Sea! Barring coloring, you're ready to go! All you have to do is decide what multiple of four you want this block to finish at, and add your seam allowances. From there, it's all about coloring.

But first, stop let's figure out components. Storm at Sea can break down into nine sub-units:
See that? 60° diamonds in rectangles and squares in squares in squares. Check out Sandi's Diamond in a Square tutorial and my tutorial on the 54-40 or Fight Block.

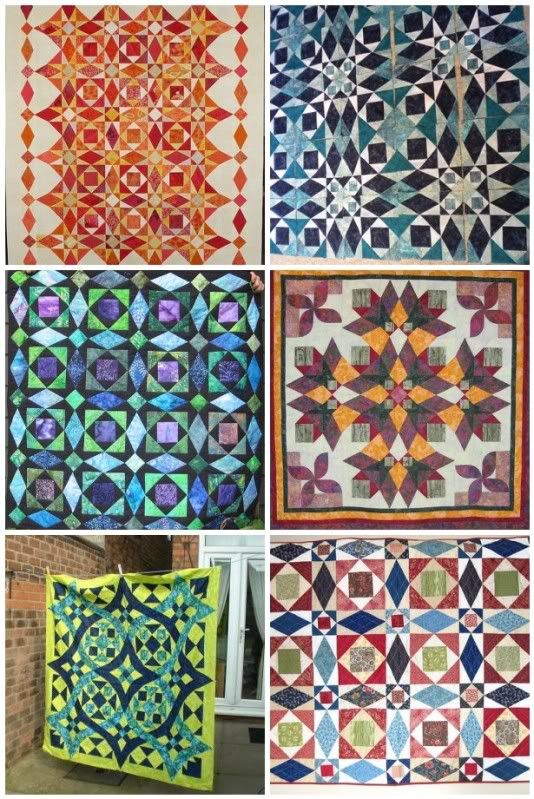
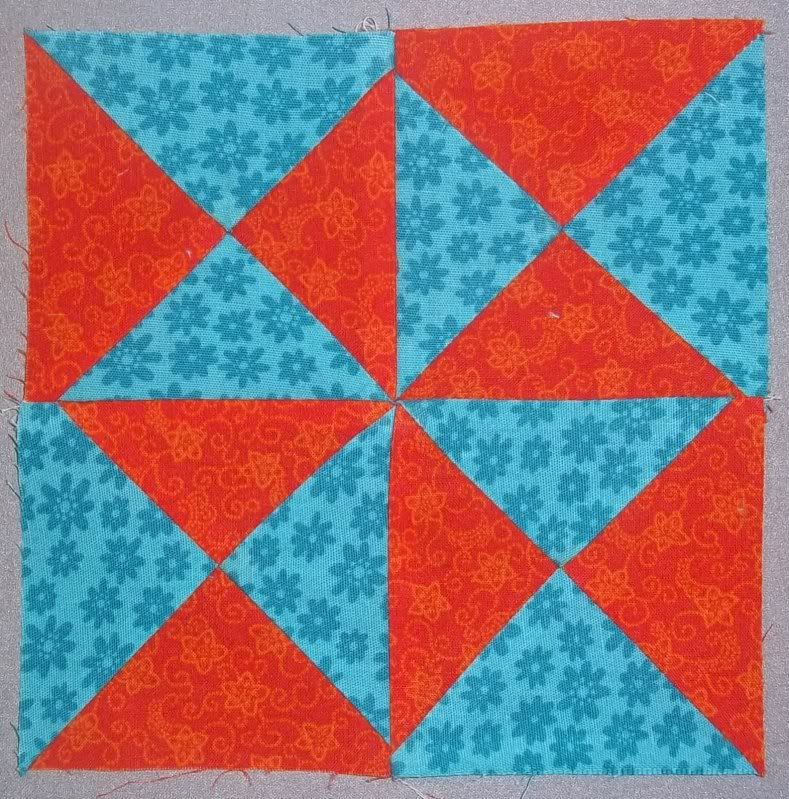
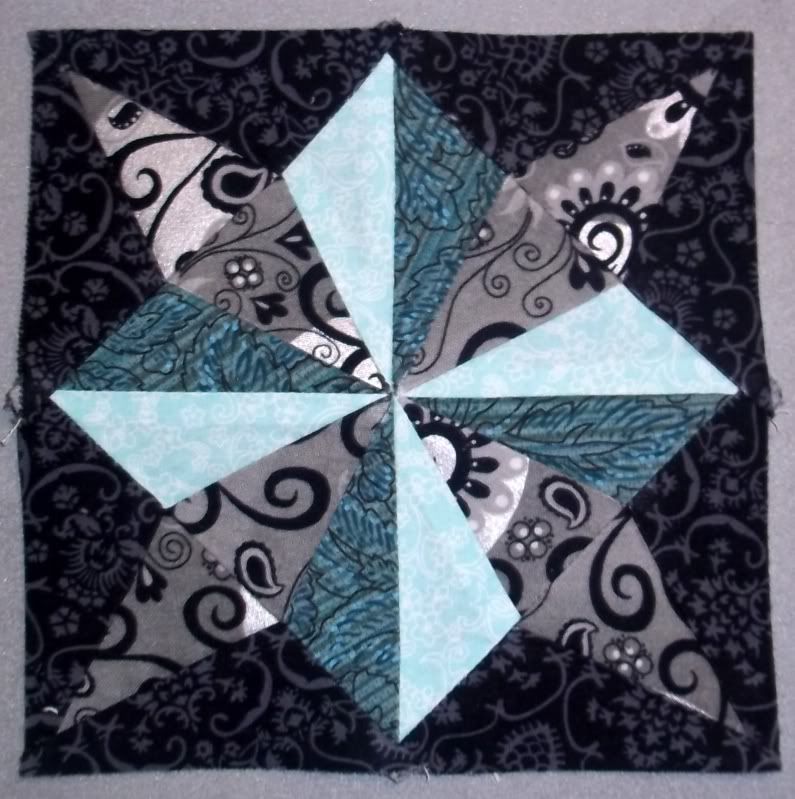
Not nearly as hard as it looked in the beginning, right? Storm at Sea is one of those blocks that makes an amazing secondary pattern when used to make an entire quilt top, based entirely on how you color it. Some of my favorite examples are:

NON GRID BLOCKS

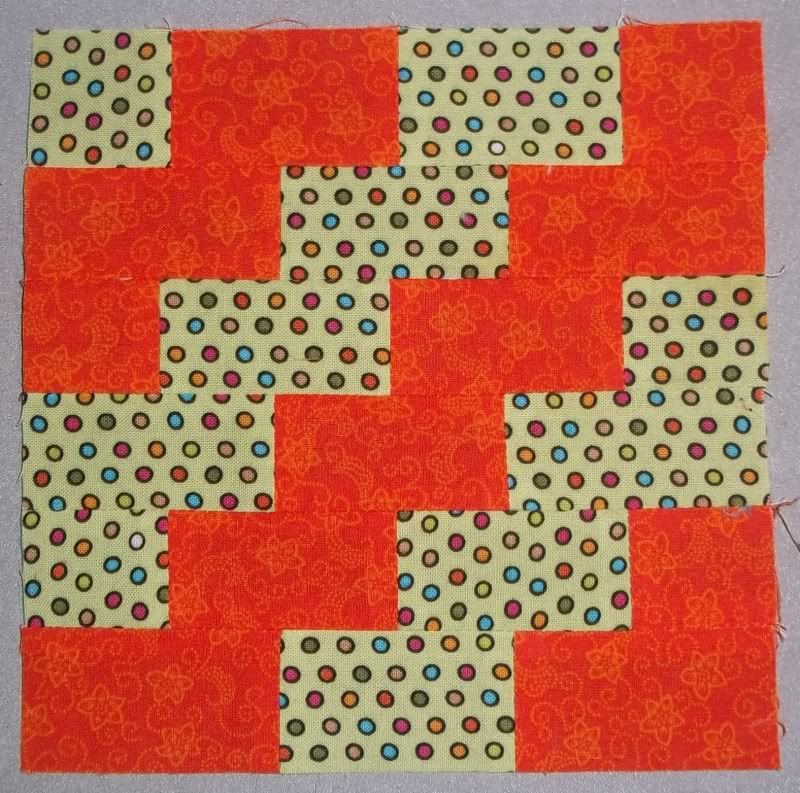
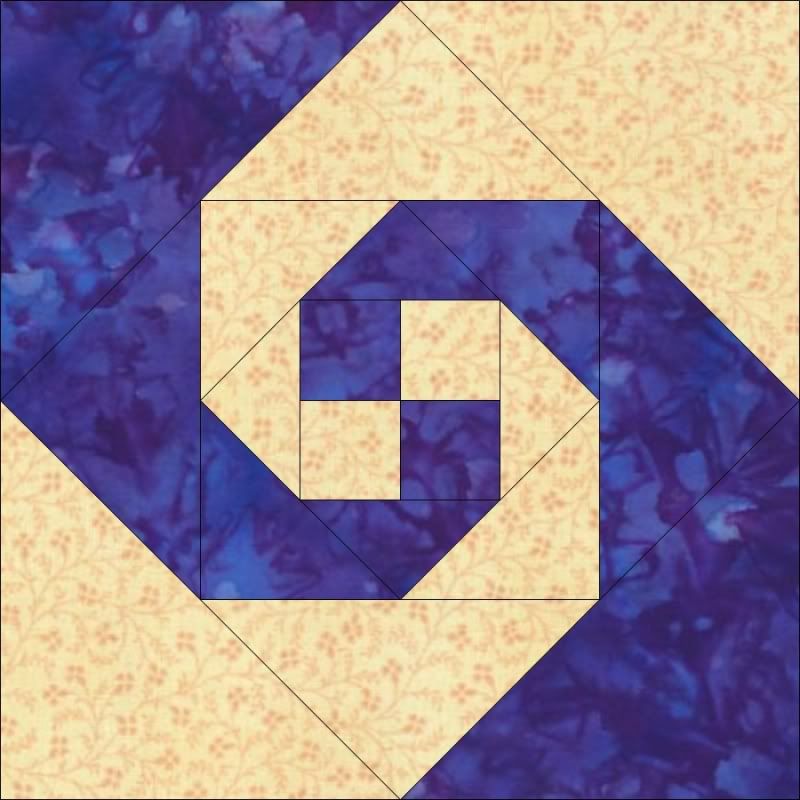
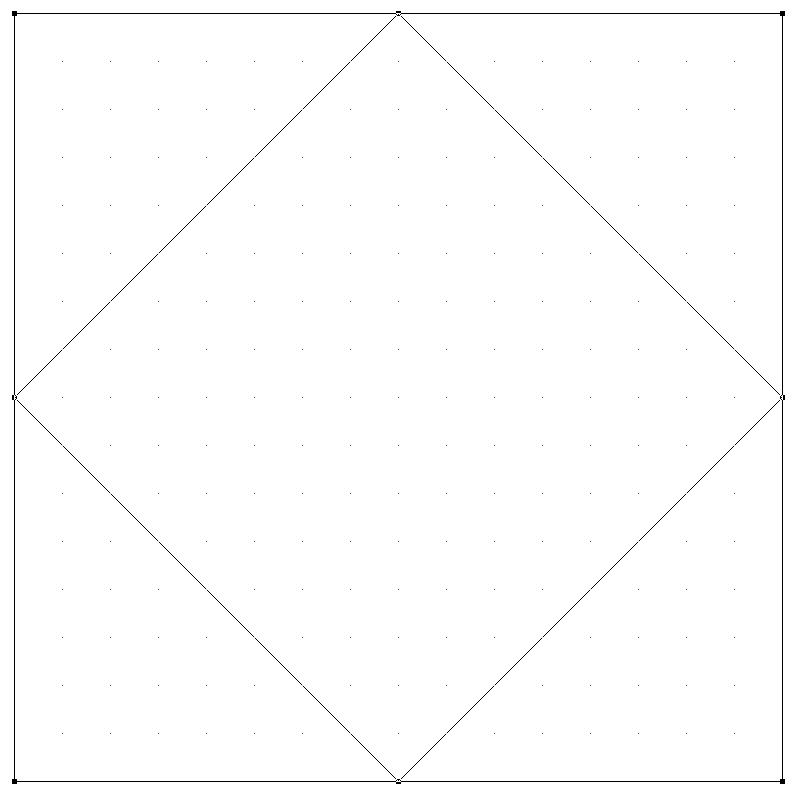
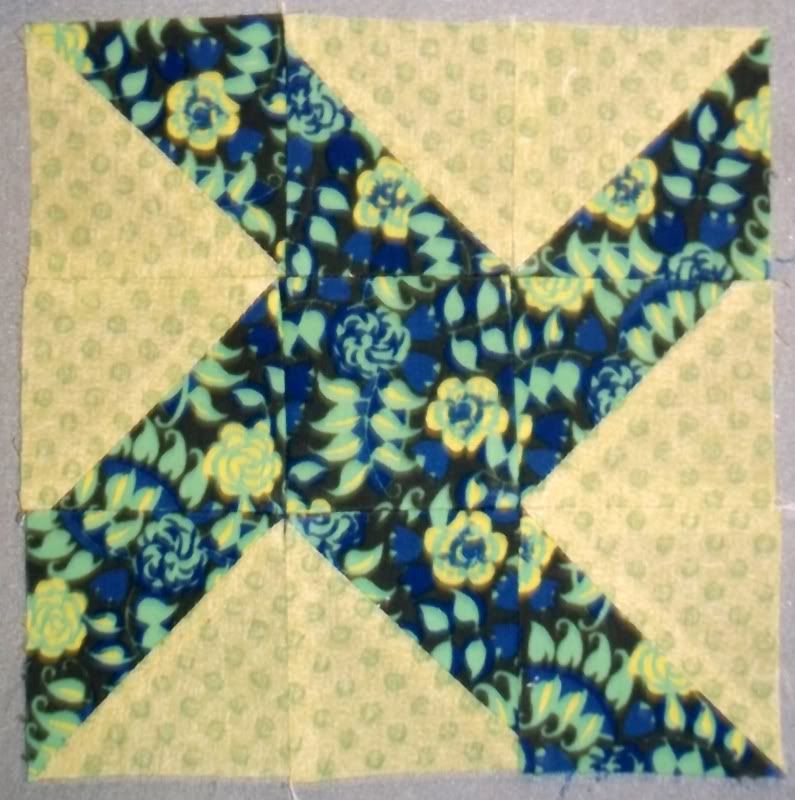
So, now what about blocks that don't have a grid at all? How about Snail Trail?
On one hand, hey, we know this essentially breaks down into a square in a square. On the other hand, we don't really know what size to make anything. Guess what? Make it whatever size you want! Just start off by breaking it into its largest square in a square:
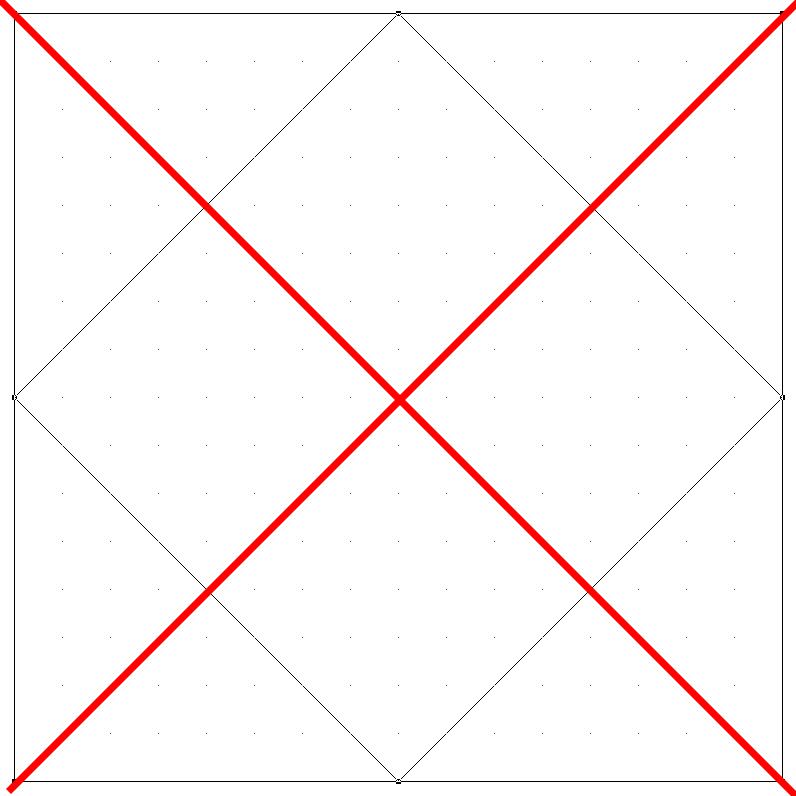
We'll 'cheat' one more time to find the corner points of the next inner square:
And that gives us:
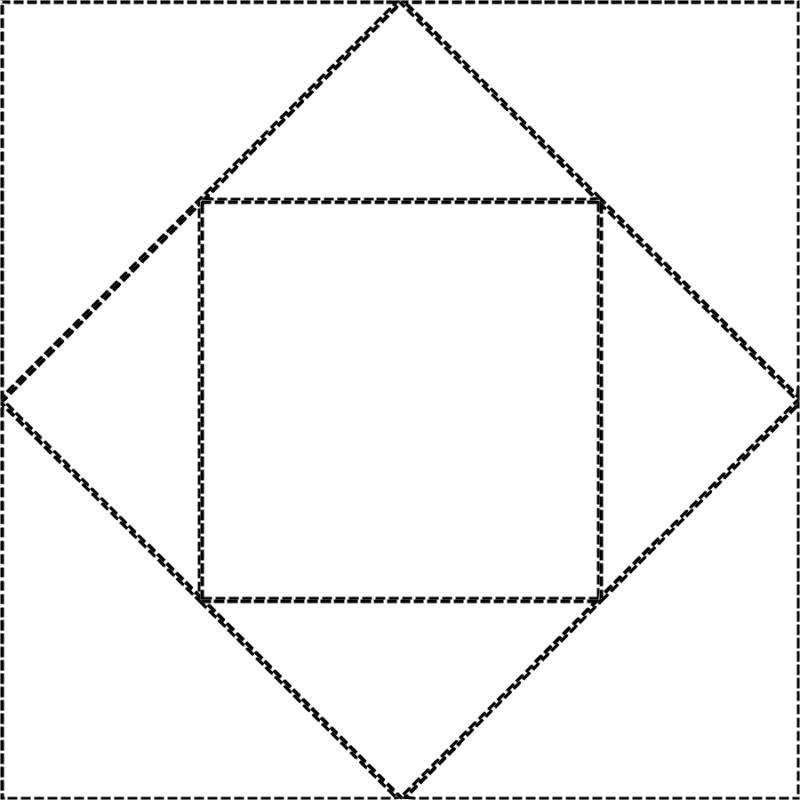
And now we need another square in that:
And another one!
And now we have a four patch in the middle:
As we've run through this block, working our way from the outside in, did any of you notice that this block is actually completely symmetrical? No, really. Look at the last line drawing again! Once again, that means this block would work great in finished sizes that are multiples of four, though any size would work. The perceived complexity of this block is all in how it's colored.

DRAFTING QUILT TOPS


Before I get into this next segment (which is turning out to be very short), let me just say that I haven't actually drafted an entire quilt top in ages. I'm on a sampler kick, have a design wall up, and haven't made anything that involves creating secondary patterns in a long time. Those full tops that have incorporated a design have been built on traditional designs, and I was able to visualize their final appearance before I even cut into my fabric.


Drafting an entire quilt top can often be a compromise between artistic vision, available fabric, and intended purpose, especially if the quilt is destined for use on a bed. Mattresses come in many sizes, and some of the more common are listed below:


Twin Size: 39" X 75"
Twin Size Long/Twin XL: 39" X 80" (This is good one to know - it's the most common size of dorm room mattresses)
Full Size: 54" X 75"
Three Quarter: 48" X 75"
Queen Size: 60" X 80"
King Size: 76" X 80"
California King: 72" X 84"

Making for a queen-sized quilt seems like an enormous task already, at 60" X 80", doesn't it? But just remember, 60" X  80" only covers the top of the mattress, and doesn't over hang the edges at all. Throw that in and you could be adding 24" or more to your width, and another 12" or more to your length.

This all becomes even more complicated when you consider settings.Should your blocks be on point? Sashing or no sashing? How many borders? Pieced borders or just strips of fabric?

Methods of drafting quilt tops can be varied. Some folks draw a quick sketch out. Others sit down with a graph paper and draw the whole thing out to scale with colored pencils. Others utilize a computer program.Use whatever method works for you. Personally, I prefer to have a computer program, because I can play with all the settings without having to stop and re-draw the thing on paper multiple times. That, and I have a toddler who insists all multi-colored media and paper belong to him. 'Nuff said, right?

Having drafting skills means that you'll be able to determine how much yardage you'll need. You can plan just how your secondary and primary patterns will emerge, particularly if you're using two blocks next to each other without sashing. And really, this is where your knowledge of color, value and scale will serve you better than the ability to draft. Once you've mastered drafting blocks, it's a quick hop over to doing the whole quilt top.

Monday, July 4, 2011

And Just Because...

I was inspired when I stopped at the blog of a fellow Farmer's Wife (Lydia of The Loop Designs) and saw her progress chart, I had to go and create my own!
Because I'm severely insane or stricken with OCD, I'm placing the photos of my blocks to match Laurie Hird's quilt. It's to give myself a preview... honest.

The Farmer's Wife Attacks Again

Happy Fourth! I'm off today, which means that my sewing machine and I have been practically inseparable, and miraculously, Zeb is cooperating by being incredibly happy and independent.

In talking with my husband, I realized that I'd nearly bypassed our 9th anniversary without comment. Yup, that's right! Back on July 4, 2002, we decided to start dating and make a go of our relationship. I'm such a guy sometimes.

Also, I managed to skip right on past this blog's second birthday! That happened back in April of this year. For a peek back at my levels of commitment to this blog, in 2009, I only posted 34 times. In 2010, I posted 89 times! This year, I've only posted 39 times, but there's still six months to the year!

Essentially, I've doubled my output! I've either made a lot of stuff, or I've gotten wordier. I'd go with wordier! (teehee!) Anyway, on to the purpose of this post:

I'm up to 13 blocks for the Farmer's Wife QAL! I've done five between Saturday and today. On Saturday:
#006 Big Dipper
This block made me want to rip my hair out. The QSTs (quarter square triangles) just would not go together the way they were supposed to. I used nearly an entire FQ of the orange print before the third try of this block came together the way it was supposed to. No paper-piecing or templates were (ab)used, but there was a lot of cussing going on. I finally figured out that my needle had gone horribly dull, and was actually catching threads of the orange on its way through the fabric and distorting my blocks.
#008 Bouquet
This one was totally paper-pieced and went together easily. I'd meant to use the green polka dot fabric for the entire basket, but when I got it all together, I found that my subconscious had over-ridden my plans and the pink fabric was the 'base'. I figure I'll leave it for now. Maybe the pink base will grow on me.

Today, I started off with paper-piecing a couple of less complicated blocks:
#030 End of Day
I decided that #110 Wood Lily looked like the lone Negative Nancy of my blocks, being the only one to have grey in it. Plus, all those brights were making me start to long for some variety. So I dug into the darker end of the stash.
#029 Economy
#029 Economy was the next super simple paper-piecing block in my stack of papers. I'm not a big fan of this super-bright pink - kind of funny that it's shown up in two blocks already! Really, I'm just trying to get rid of it. I figure in a sampler quilt like The Farmer's Wife, I won't see it so much.
#018 Century of Progress
And because I was into the pile of foundation sheets that I'd already printed, I went ahead with #018 Century of Progress. Let me just say that I think this block is horribly ugly as presented in the book! It's a beautiful, symmetrical design, which is just lost the way Laurie Hird sewed it together. I had to take some artistic license and make it pretty.
This block requires absolutely no templates or paper-piecing. About the only thing I wish I'd done differently was to not nest my seams. I would have preferred it to lay flatter, which would have required all my seams to be pressed open. It's all right - the block is presentable enough, but it's a good thing for me to keep in mind.

For a practically fool-proof method of doing HSTs without sewing on the bias edges, check out the second half of my The Basics of Pinwheels tutorial:
Silly me - I got hyper-focused and forgot that each square section would make two HST squares, so I ended up with sixteen of the HST units. *facepalm*
Which is why I ended up moving ahead and making #012 Broken Sugar Bowl. I just couldn't bring myself to call those extra HSTs a waste so I found a block that used the same size HSTs. I still have some left...
But anyway! This is another block that needs absolutely no templates or paper-piecing. 

Clearly, I'm in a 'take no prisoners' frame of mind. I still feel a burning need to hit the sewing machine and conquer some more blocks, and to make my Double Wedding sub-units cry and call me 'mommy'.