

Together, they made an interesting secondary pattern when one stepped back and looked at the overall quilt top. I was very pleased with the efforts of my second quilt. Sadly, I have no photos of this early effort of mine...
Anyway, let's move on from the personal history lesson and go to a small history lesson. 54-40 or Fight actually takes its name from the conflict over the border between what is now Canada and the United States in the Oregon Territory. "Fifty-four Forty or Fight!" was actually a political slogan of the time.
Of course, now you're all wondering just how we're supposed to piece this lovely block? Well, a fair bit of this block is all strip piecing because five of the nine sub-units are four patches. The other four are 60° triangles in squares. We've already covered strip-piecing here, so you'll see some repetition here. New to us are the 60° triangles.
Let's start off with our four patch units. Our final block will be 9" finished, so each subunit will finish at 3". That means that the strips of Fabrics A and B should each be 2" wide and 20" long. Sew together, press seams as desired, and slice into ten 2" segments. Sew into the required four patch subunits, making sure that your colors are alternating correctly, and press as desired once again. Set these subunits aside for the moment. I failed to take photos of each step of the strip/chain piecing portion of this. My apologies.
As stated before, each subunit will finish at 3". You'll need one 3 1/2" by 12" strip of Fabric B and one 3 1/2" by 12" strip of Fabric C - and that's leaving extra fabric. I've used four different fabrics in this block for this tutorial - you can do the same or use just the traditional three.

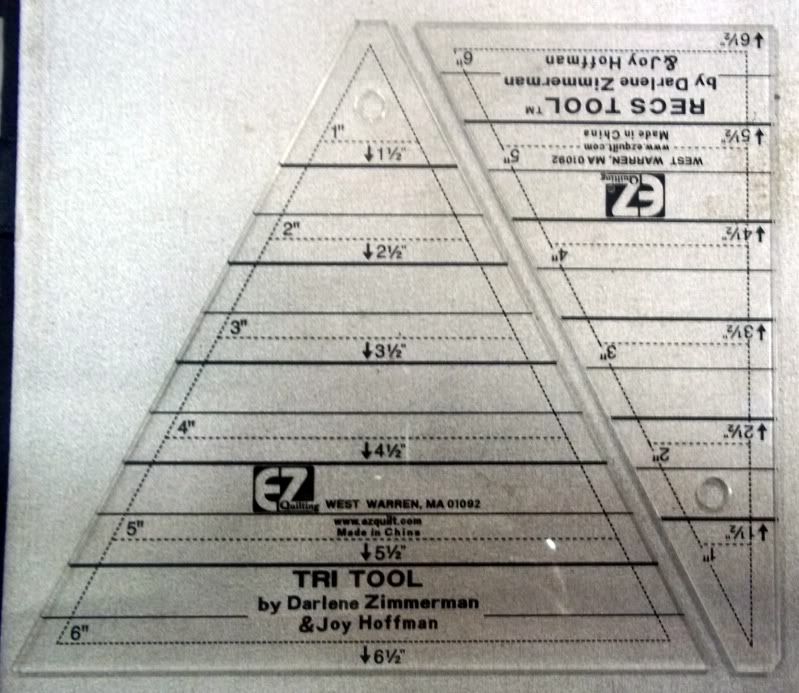
 Take your 3 1/2" by 12" strip of Fabric B, and this is where you'll begin seeing how nice these rulers are... Your finished subunit needs to be 3", which is why both strips are 3 1/2". So, all you have to do is line up your ruler on the 3 1/2" line and start cutting, flipping the ruler 180° to maximize your strip. You need four of the above shape.
 Repeat the process with your Fabric C and the other ruler. You need eight of this shape. If you're using a print for this shape, you'd have to flip the ruler over to create reverse image pieces, then you'd need four of each side. Pay careful attention that you trim that little angle at the narrow tip of the triangle indicated by the ruler. You'll see why in just a moment.

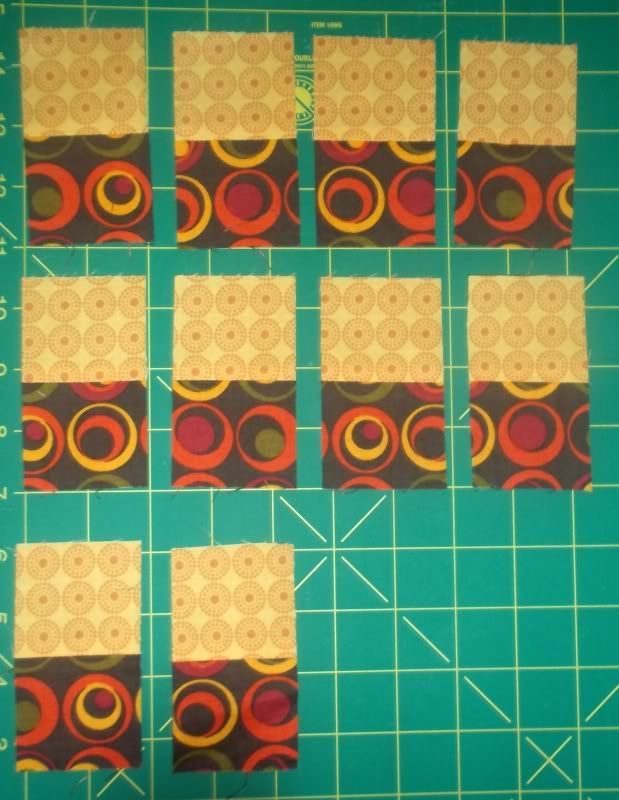
 Now, go ahead and line your first piece up as shown in the photo above and to the right. That little angle I told you to make sure to trim? That shows you exactly where the two pieces should line up together. The rulers have the 1/4" seams built into them, so all you have to do is follow your sewing foot or other marker. Pin if you like, but I didn't. Now, sew your first 'wing' on, press as desired, and sew on the next wing. Again, press as desired. Repeat for the other three 60° triangles in squares subunits.
 Line up your pieces as pictured above - I like to do this because I will *so* put something on backwards or turned the wrong way around. Chain piece and press as desired and end up with:
 One more block for our ongoing series! I've been doing them all in a coordinated scrappy look. Here's what I have so far:


0 comments:
Post a Comment
Questions? Comments? Random fact? Put it here!